
achieve
US /əˈtʃiv/
UK /ə'tʃi:v/
- Transitive Verb
- To succeed in doing good, usually by working hard
- To succeed in reaching a particular goal, status, or standard, often after effort or perseverance.
A2TOEICMorealcohol
US /ˈælkəˌhɔl,-ˌhɑl/
UK /'ælkəhɒl/
- Uncountable Noun
- A colorless liquid that can catch fire (C2H5OH)
- Drinks such as wine, whiskey, beer
B1Moreas a gift
US
UK
- Phrase
- Given without expectation of payment; a present.
A2Moreas you like
US
UK
- Phrase
- In any way that you want; according to your preference.
- Interjection
- An expression of agreement or permission.
A1Moreat least
US /æt list/
UK /æt li:st/
- Adverb
- As a minimum
- Not less than
- Phrase
- No less than; at the minimum
- Used to indicate that something is positive in a bad situation.
C2Moreat the same time
US
UK
- Phrase
- Simultaneously; at the identical moment.
- Nevertheless; however; used to introduce a contrasting or qualifying statement.
A1Morebreak in
US /brek ɪn/
UK /breik in/
- Phrasal Verb
- To wear new (shoes, etc.) to make them comfortable
- To interrupt someone's conversation, task
- Verb (Transitive/Intransitive)
- To interrupt a conversation or activity.
- To wear something new until it becomes comfortable.
A1Moreby now
US /baɪ naʊ/
UK /bai nau/
- Phrase
- At the present time or already; before the present.
A2Morecheck out
US /tʃɛk aʊt/
UK /tʃek aut/
- Phrase
- Phrasal Verb
- To find out information about something
- To take books out of a library
A1Morecool down
US /kul daʊn/
UK /ku:l daun/
- Phrasal Verb
- To become cooler; to reduce in temperature.
- To become calm and relaxed after being angry or excited.
- Intransitive Verb
- To perform light exercises after a more intense workout to gradually decrease heart rate and breathing.
A2Morecut off
US /kʌt ɔf/
UK /kʌt ɔf/
- Phrasal Verb
- To end a process, e.g. a phone call
- To cut the end of something
- Transitive Verb
- To isolate or prevent access to a place or person.
- To interrupt someone while they are speaking.
A1Moredepend
US /dɪˈpend/
UK /dɪˈpend/
- Verb (Transitive/Intransitive)
- Be controlled or determined by (someone/something)
- To rely on someone or something for support, help, or existence.
B1TOEICMoredescription
US /dɪˈskrɪpʃən/
UK /dɪˈskrɪpʃn/
- Noun
- Explanation of what something is like, looks like
- The type or nature of someone or something.
A2TOEICMoredesire
US / dɪˈzaɪr/
UK /dɪ'zaɪə(r)/
- Transitive Verb
- To wish for, hope or want something
- Noun (Countable/Uncountable)
- Thing that is wished for or wanted
- A strong feeling of sexual wanting.
A2Moredetach
US /dɪˈtætʃ/
UK /dɪˈtætʃ/
- Transitive Verb
- To send away a military unit on a special mission
- To separate something from something larger
B1Moredip
US /dɪp/
UK /dɪp/
- Intransitive Verb
- To decrease or lower temporarily
- Noun (Countable/Uncountable)
- Food or sauce eaten with crackers/raw vegetables
- Place on surface (e.g. a road) lower than the rest
B1Moreend up with
US
UK
- Phrasal Verb
- To have something as a result.
A1Moreexcess
US /ˈɛkˌsɛs/
UK /ɪkˈses/
- Noun (Countable/Uncountable)
- Amount that is more than necessary or over a limit
- An extra amount.
- Verb (Transitive/Intransitive)
- To be more than or go beyond.
B1Moreexperiment
US /ɪkˈspɛrəmənt/
UK /ɪk'sperɪmənt/
- Noun (Countable/Uncountable)
- Test performed to assess new ideas or theories
- A course of action tentatively adopted without being sure of the eventual outcome.
- Verb (Transitive/Intransitive)
- To create and perform tests to research something
- To try something new that you haven't tried before
A2TOEICMorego ahead
US /ɡo əˈhɛd/
UK /ɡəu əˈhed/
- Phrasal Verb
- To start an activity; start doing, working etc.
- To give permission to do something
- Intransitive Verb
- To start or proceed with something
- To proceed despite potential obstacles or doubts.
A1Morehave to
US /hæv tu/
UK /ˈhæv tə/
- Auxiliary Verb
- Must do
A1Morein mind
US /ɪn maɪnd/
UK /in maind/
- Phrase
- Being aware of or considering something.
- To remember or consider something.
A2Morein the end
US /ɪn ði ɛnd/
UK /in ðə end/
- Phrase
- Finally; after a period of time or series of events.
- Ultimately; as the final result or consequence.
A1Morein the future
US /ɪn ði ˈfjutʃɚ/
UK /in ðə ˈfju:tʃə/
- Phrase
- At a later time; in times to come.
A1Morein the meantime
US /ɪn ði ˈminˌtaɪm/
UK /in ðə ˈmi:ntaim/
- Phrase
- During the time between two events; meanwhile.
A1Moreinspire
US /ɪnˈspaɪr/
UK /ɪn'spaɪə(r)/
- Transitive Verb
- To give someone an idea to do or make something
- To make someone feel a certain emotion
- Intransitive Verb
- To breathe in
- To draw (air, etc.) into the lungs.
B1TOEICMorelayer
US /ˈleɚ/
UK /ˈleiə/
- Noun (Countable/Uncountable)
- One of several sheets of a material or object
- A covering of something spread over a surface.
- Transitive Verb
- To put things one on top of another
B1TOEICMoremelon
US /ˈmɛlən/
UK /ˈmelən/
- Countable Noun
- Hard round fruit with sweet juicy flesh and seeds
B2Moremelt
US /mɛlt/
UK /melt/
- Verb (Transitive/Intransitive)
- To disappear or to go away
- To make, become soft or liquid due to heat
- Uncountable Noun
- A mass of material that has been melted, especially metal.
B1Moremold
US /mold/
UK /məʊld/
- Noun
- Distinctive type of character or nature
- Fungus growing on old food or in wet dark places
- Transitive Verb
- To influence a person's character or behavior
- To form something into a shape
B1Moremove around
US /muv əˈraʊnd/
UK /mu:v əˈraund/
- Phrasal Verb
- To change position or location; to go from place to place.
- Intransitive Verb
- To spread or circulate (e.g., information, rumors).
on the surface
US /ɑn ði ˈsɚfəs/
UK /ɔn ðə ˈsə:fis/
- Phrase
- Appearing to be true or real until examined more closely.
- Located on the outer part or uppermost layer of something.
B2Morepoppy
US /ˈpɑpi/
UK /'pɒpɪ/
- Noun
- Red flowering plant, a source of heroin
C1Morepopsicle
US /ˈpɑpsɪkəl, -ˌsɪkəl/
UK /ˈpɔpsikl/
- Countable Noun
- Sweet frozen candy on a stick
C1Morepour
US /pɔr, por/
UK /pɔ:(r)/
- Verb (Transitive/Intransitive)
- To fill a person's glass or cup with a drink
- To make something flow in a steady stream
A2Morepour in
US /pɔr ɪn/
UK /pɔ: in/
- Phrasal Verb
- To arrive or enter a place in large numbers or amounts.
- To add a liquid to something.
A1Morepress
US /prɛs/
UK /pres/
- Noun
- Machine using pressure to shape, flatten, squeeze
- General term for TV, radio, newspapers
- Transitive Verb
- To make clothes smooth using a heated iron; iron
- To repeatedly ask someone to do something
A2TOEICMoreprevent
US /prɪˈvɛnt/
UK /prɪ'vent/
- Transitive Verb
- To stop something from happening or existing
A2TOEICMorerealistic
US /ˌriəˈlɪstɪk/
UK /ˌri:əˈlɪstɪk/
- Adjective
- Looks or appears real; like things really are
- Having or showing a practical awareness of things as they are
A2Morerecommend
US /ˌrɛkəˈmɛnd/
UK /ˌrekə'mend/
- Transitive Verb
- To advise or suggest that someone do something
- To endorse or support something publicly.
A2TOEICMoreresult
US /rɪˈzʌlt/
UK /rɪ'zʌlt/
- Noun
- Something produced through tests or experiments
- Final score of a competition, election or game
- Intransitive Verb
- To be the outcome of other causes and effects
- To happen or exist as a consequence of something.
A2Morerub
US /rʌb/
UK /rʌb/
- Transitive Verb
- To spread a cream, etc., using a repeated motion
- To move something back and forth along a surface
- Noun
- Act of moving you hand forcefully along a surface
B1Moreruin
US /ˈruɪn/
UK /'ru:ɪn/
- Transitive Verb
- To damage or completely destroy something
- To cause someone to lose their money or status
- Noun (Countable/Uncountable)
- Remains of a building that has been destroyed
- The state of being destroyed or severely damaged.
B1Moresame time
US
UK
- Phrase
- Occurring simultaneously or at the same point in time.
- At the identical time as before; recurring at a fixed hour.
- Noun
- An equal duration or period.
A1Morescent
US /sɛnt/
UK /sent/
- Transitive Verb
- To become aware of the presence of a smell, etc.
- To add smell to something
- Noun
- Pleasant smell, as of flowers or perfume
B1TOEICMoresecure
US /sɪˈkjʊr/
UK /sɪ'kjʊə(r)/
- Transitive Verb
- To get or achieve something with certainty
- To firmly attach something to something else
- Adjective
- Being attached to something tightly and surely
- (Place that is) locked, guarded and safe
A2TOEICMoresink
US /sɪŋk/
UK /sɪŋk/
- Transitive Verb
- To push something down into the ground
- To dig (a well)
- Countable Noun
- Large bowl in a kitchen or washroom for washing
A2TOEICMoreslightly
US /ˈslaɪtli/
UK /ˈslaɪtli/
- Adverb
- Only a little
B1Moresqueeze
US /skwiz/
UK /skwi:z/
- Noun (Countable/Uncountable)
- Amount of liquid from firmly pressing e.g. orange
- Act of putting pressure on, as to get liquid out
- Transitive Verb
- To force or threaten someone to give you something
- To strongly compress something to get liquid out
C1Morestain
US /sten/
UK /steɪn/
- Noun (Countable/Uncountable)
- A mark or unwanted spot / thing
- Liquid used to change the color of something
- Transitive Verb
- To soil or leave a mark on something
- To change the color of using a special substance
B1Moresurface
US /ˈsɚfəs/
UK /'sɜ:fɪs/
- Transitive Verb
- To give (road) a top layer
- Intransitive Verb
- To appear after being hidden, unseen, or unknown
- To come to the top of something; emerge
A2TOEICMorethick
US /θɪk/
UK /θɪk/
- Adjective
- Difficult to see through, as fog
- Full of (people, etc.)
- Adverb
- In close association or friendship.
A2Moreto let
US /tu lɛt/
UK /tu let/
- Preposition
- Indicates that a property is available for rent.
A2Moretransparent
US /trænsˈpærənt/
UK /trænsˈpærənt/
- Adjective
- Being open to see and to public criticism
- Able to be seen through
B2Moreturn out
US /tɚn aʊt/
UK /tə:n aut/
- Phrasal Verb
- To arrive for a public event or entertainment
- To happen to be in the end
A1Moreturned out
US
UK
- Phrasal Verb
- To arrive for a public event or entertainment
- To happen to be in the end
- Transitive Verb
- To extinguish or switch off lights.
A1Moretwitter
US /ˈtwɪtɚ/
UK /ˈtwɪtə(r)/
- Intransitive Verb
- To make small chattering sounds, like some birds
- Proper Noun
- An online messaging system
C2Moreversion
US /ˈvɚʒən, -ʃən/
UK /ˈvə:ʃən/
- Noun
- Different way that someone interprets something
- New or different form of something
A2TOEICMorewrap
US /ræp/
UK /ræp/
- Countable Noun
- Piece of clothing worn loosely on the shoulders
- Thin bread filled with food and rolled
- Transitive Verb
- To be or move around something
- To cover something with paper or a cloth e.g. gift
B1Morewrap around
US /ræp əˈraʊnd/
UK /ræp əˈraund/
- Phrasal Verb
- To encircle or surround something.
- To extend or stretch around something.
A2More
Vocabulary
- cool down: To become cooler; to reduce in temperature.
- go ahead: To start an activity; start doing, working etc.
- in the end: Finally; after a period of time or series of events.
- cut off: To end a process, e.g. a phone call
- as a gift: Given without expectation of payment; a present.
- at the same time: Simultaneously; at the identical moment.
- same time: Occurring simultaneously or at the same point in time.
- break in: To wear new (shoes, etc.) to make them comfortable
- check out
- on the surface: Appearing to be true or real until examined more closely.
- as you like: In any way that you want; according to your preference.
- in the meantime: During the time between two events; meanwhile.
- end up with: To have something as a result.
- pour in: To arrive or enter a place in large numbers or amounts.
- by now: At the present time or already; before the present.
- to let: Indicates that a property is available for rent.
- at least: As a minimum
- move around: To change position or location; to go from place to place.
- turn out: To arrive for a public event or entertainment
- have to: Must do
- in mind: Being aware of or considering something.
- wrap around: To encircle or surround something.
- turned out: To arrive for a public event or entertainment
- in the future: At a later time; in times to come.
- recommend: To advise or suggest that someone do something
- slightly: Only a little
- description: Explanation of what something is like, looks like
- completely: In every way or as much as possible
- ruin: To damage or completely destroy something
- experiment: Test performed to assess new ideas or theories
- version: Different way that someone interprets something
- wrap: Piece of clothing worn loosely on the shoulders
- achieve: To succeed in doing good, usually by working hard
- squeeze: Amount of liquid from firmly pressing e.g. orange
- measure: Plan to achieve a desired result
- desire: To wish for, hope or want something
- prevent: To stop something from happening or existing
- inspire: To give someone an idea to do or make something
- bit: Device put in a horse's mouth to control it
- pour: To fill a person's glass or cup with a drink
- transparent: Being open to see and to public criticism
- result: Something produced through tests or experiments
- rub: To spread a cream, etc., using a repeated motion
- scent: To become aware of the presence of a smell, etc.
- layer: One of several sheets of a material or object
- create: To make, cause, or bring into existence
- surface: To give (road) a top layer
- realistic: Looks or appears real; like things really are
- secure: To get or achieve something with certainty
- sink: To push something down into the ground
- thick: Difficult to see through, as fog
- alcohol: A colorless liquid that can catch fire (C2H5OH)
- pretty: Being attractive to the eye in a simple way
- excess: Amount that is more than necessary or over a limit
- press: Machine using pressure to shape, flatten, squeeze
- mold: Distinctive type of character or nature
- dip: To decrease or lower temporarily
- depend: Be controlled or determined by (someone/something)
- prefer: To like something better than something else
- melt: To disappear or to go away
- stain: A mark or unwanted spot / thing
- pull: Act of breathing in smoke, as from a pipe
- popsicle: Sweet frozen candy on a stick
- part: Division of a book
- detach: To send away a military unit on a special mission
- design: To plan in a particular way to fulfill a purpose
- remove: To get rid of something completely
- lot: What happens to a person in life from chance; fate
- add: To include as well
- quick: Using very little time; moving far in little time
- time: Speed at which music is played; tempo
- favourite: A thing that someone likes best or enjoys most
- twitter: To make small chattering sounds, like some birds
- melon: Hard round fruit with sweet juicy flesh and seeds
- poppy: Red flowering plant, a source of heroin
Get the full experience in the app
Learn anywhere with detailed sentence and usage analysis
01:03
She took a brave step forward, leaving behind her comfort zone to chase her dreams.
Vocabulary
- brave
adj. Having courage
- comfort zone
phr. A familiar situation where one feels safe
Explanation
a brave step is a noun phrase, where brave is an adjective modifying the noun step, meaning "a courageous step".
forward is an adverb modifying step, meaning "ahead".
The whole phrase serves as the object, answering the "what" of took (verb) — she took a brave step forward.
Get the full experience in the app
Look up words anytime with pronunciation, part of speech, and usage
brave
US/brev/
UK/breɪv/
adj.Brave
v.t.To bravely face
A2 Elementary
Get the full experience in the app
Practice speaking anytime and get instant pronunciation feedback
Try this speaking exercise.
Try practicing with this sentence.
80
0
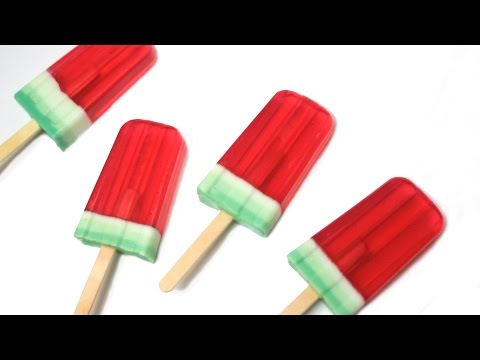
pon posted on 2017/08/22Love watermelon and DIY? You'll adore this fun tutorial on making your own adorable watermelon popsicle soap! You'll pick up tons of useful vocabulary related to melt and pour glycerin soap, perfect for practicing simple sentence structures and learning new crafting terms.
Learn this video on the APP!
The VoiceTube App has more in-depth practice for videos!