
absolutely
US /ˈæbsəˌlutli, ˌæbsəˈlutli/
UK /ˈæbsəlu:tli/
- Adverb
- Completely; totally; very
- Considered independently and without relation to other things; viewed abstractly; as, quantity absolutely considered.
A2Moreactivate
US /ˈæktəˌvet/
UK /ˈæktɪveɪt/
- Transitive Verb
- To cause to happen; cause a chemical reaction
- To make something start working
B1Moreas well as
US /æz wɛl æz/
UK /æz wel æz/
- Adverb
- Also; in addition to
- Preposition
- In addition to; and also.
A1Morecameraman
US /ˈkæmərəˌmæn, ˈkæmrə-/
UK /ˈkæmrəmæn/
- Countable Noun
- Man who operates movie cameras as a job
C2Morechop
US /tʃɑp/
UK /tʃɒp/
- Verb (Transitive/Intransitive)
- To cut into pieces with an up and down motion
- To hit someone with your hand
- Noun (Countable/Uncountable)
- A hit with the hand in a sideways motion
- Thick slice of meat still attached to a bone
B1Morecombine
US /kəmˈbaɪn/
UK /kəmˈbaɪn/
- Verb (Transitive/Intransitive)
- To mix several things together to form one thing
- To harvest by means of a combine.
- Noun (Countable/Uncountable)
- A harvesting machine for cutting, threshing, and cleaning grain.
- A mixture of different things.
A2Morecounter
US /ˈkaʊntɚ/
UK /'kaʊntə(r)/
- Transitive Verb
- To say or do something in opposition or resistance
- To try to prevent, as by making a different point
- Prefix
- Being opposite or against something
B1Morecouple
US /ˈkʌpəl/
UK /'kʌpl/
- Transitive Verb
- To join something to something else
- (Two animals) to engage in sexual relations
- Noun (Countable/Uncountable)
- Two people in a romantic relationship
- Two of something; two people; a pair
A2Moredandy
US /ˈdændi/
UK /'dændɪ/
- Countable Noun
- Man who is far too interested in his clothes
C1Moredelightful
US /dɪˈlaɪtfəl/
UK /dɪˈlaɪtfl/
- Adjective
- Greatly pleasing or entertaining
B2Moredough
US /do/
UK /dəu/
- Uncountable Noun
- Substance made from flour and water to bake bread
- (slang) Money.
B2Moredrizzle
US /'drɪzl/
UK /ˈdrɪzl/
- Uncountable Noun
- Light rain
B2Moreeffort
US /ˈɛfət/
UK /ˈefət/
- Uncountable Noun
- Amount of work used trying to do something
- A conscious exertion of power; a try.
A2TOEICMoreexpire
US /ɪkˈspaɪr/
UK /ɪk'spaɪə(r)/
- Intransitive Verb
- To breathe out
- To die
B2TOEICMoreextract
US /ɪkˈstrækt/
UK /'ekstrækt/
- Noun (Countable/Uncountable)
- Essential ingredient of a natural thing
- Part taken from a longer written work
- Transitive Verb
- To get a substance out of a plant, etc.
- To get a person to share secret information
B1TOEICMorefabulous
US /ˈfæbjələs/
UK /ˈfæbjələs/
- Adjective
- Almost impossible to believe, incredible
- Almost impossible to believe; mythical.
B2Morefantastic
US /fænˈtæstɪk/
UK /fænˈtæstɪk/
- Adjective
- Strange or unusual in design or appearance
- Very large, fast or great
A2Morefoam
US /foʊm/
UK /fəʊm/
- Noun (Countable/Uncountable)
- Mix of a liquid and air to form a mass of bubbles
- A lightweight material made of a mass of small bubbles, used for insulation or padding.
- Verb (Transitive/Intransitive)
- To mix air and liquid to form a mass of bubbles
- To show anger or excitement in an uncontrolled way.
B1Morefold
US /fold/
UK /fəʊld/
- Transitive Verb
- To bend one part of something against another
- (Of business) to fail or close down
- Countable Noun
- Pen where sheep are kept
- Group of people who have a common belief
B1TOEICMorefor example
US
UK
- Phrase
- As an illustration or instance.
for myself
US /fɚ maɪˈsɛlf/
UK /fə maɪˈself/
- other
- Done for one's own benefit or use.
A1Morefridge
US /frɪdʒ/
UK /frɪdʒ/
- Noun
- An electric cool box for keeping food fresh
A2Moregoing on
US /ˈɡoɪŋ ɑn/
UK /ˈgəʊɪŋ ɔn/
- Phrasal Verb
- To continue doing something
- To happen (usually negative)
A1Moregorgeous
US /ˈɡɔrdʒəs/
UK /'ɡɔ:dʒəs/
- Adjective
- Extremely attractive; richly beautiful
- Delightfully enjoyable or pleasant.
B1Morehandy
US /ˈhændi/
UK /'hændɪ/
- Adjective
- Convenient, easy to use, easy to reach
- Being skillful in performing small tasks
C2Morehave to
US /hæv tu/
UK /ˈhæv tə/
- Auxiliary Verb
- Must do
A1Morehold on
US /hold ɑn/
UK /həuld ɔn/
- Phrasal Verb
- To wait for someone (e.g. on a phone call)
- To wait for a short time.
A1Morein mind
US /ɪn maɪnd/
UK /in maind/
- Phrase
- Being aware of or considering something.
- To remember or consider something.
A2Moreinside of
US /ɪnˈsaɪd ʌv/
UK /inˈsaid ɔv/
- Preposition
- Within; in the inner part of.
- Within a certain period of time.
A1Moreinstead of
US /ɪnˈstɛd ʌv/
UK /inˈsted ɔv/
- Preposition
- When one thing is replaced by another
- Adverb
- As a substitute or alternative.
A1Moreladle
US /ˈledl:/
UK /ˈleɪdl/
- Countable Noun
- Large spoon with deep bowl for serving e.g. soup
- Transitive Verb
- To put liquid from a pan into a bowl with a ladle
C1Morelight on
US /laɪt ɑn/
UK /lait ɔn/
- Phrasal Verb
- To illuminate something.
- To discover something unexpectedly.
- Adjective
- Gentle or delicate in the use of something.
A1Morelook at
US /lʊk æt/
UK /luk æt/
- Phrasal Verb
- To use your eyes to focus on something
- To focus your eyes on something carefully
A1Moremaple
US /ˈmepəl/
UK /ˈmeɪpl/
- Noun
- Any of various trees, some producing syrup
B2Moremelt
US /mɛlt/
UK /melt/
- Verb (Transitive/Intransitive)
- To disappear or to go away
- To make, become soft or liquid due to heat
- Uncountable Noun
- A mass of material that has been melted, especially metal.
B1Moreoff of
US /ɔf ʌv/
UK /ɔf ɔv/
- Preposition
- From a position on something; down from.
A1Moreohh
US
UK
- Interjection
- Expression showing surprise
C2Moreon hand
US /ɑn hænd/
UK /ɔn hænd/
- Adverb
- Present and available; in attendance.
- Phrase
- Available; readily accessible.
A1Moreon the inside
US /ɑn ði ɪnˈsaɪd/
UK /ɔn ðə inˈsaid/
- Phrase
- Having a position of authority or influence within an organization or system.
- In prison; incarcerated.
- Adjective
- Possessing secret or confidential information.
A1Morepinch
US /pɪntʃ/
UK /pɪntʃ/
- Uncountable Noun
- A very small amount of something
- Transitive Verb
- To cause pain by pressing against something
- To squeeze painfully between e.g. thumb and finger
B1TOEICMoreplastic
US /ˈplæstɪk/
UK /'plæstɪk/
- Uncountable Noun
- Stiff but usually flexible man-made material
- Adjective
- Being easily formed or shaped
A2Morepoint out
US /pɔɪnt aʊt/
UK /pɔint aut/
- Phrasal Verb
- To make others aware of an idea
- To draw attention to something or someone
A1Morepop
US /pɑp/
UK /pɒp/
- Verb (Transitive/Intransitive)
- To cause something to open or burst suddenly
- To go to or in a place for a brief period of time
- Noun (Countable/Uncountable)
- Sweet soda drink
- A short, sharp, explosive sound.
B2Morepour
US /pɔr, por/
UK /pɔ:(r)/
- Verb (Transitive/Intransitive)
- To fill a person's glass or cup with a drink
- To make something flow in a steady stream
A2Morerack
US /ræk/
UK /ræk/
- Noun
- A frame, stand, hook on which things are hung
- Transitive Verb
- To cause someone pain or suffering
B1Moreregular
US /ˈrɛɡjəlɚ/
UK /ˈregjələ(r)/
- Adjective
- Having an equal amount of space or time in between
- Occurring or being done frequently
- Noun (Countable/Uncountable)
- Customers who frequently visit a place
- Soldier who has a permanent job in the army
A2TOEICMoreseparate
US /'sepəreɪt/
UK /'sepəreɪt/
- Adjective
- Being different from or unrelated to another
- Not connected; different.
- Transitive Verb
- To divide two things by being in between them
- To move things away from each other
A2TOEICMoreserve
US /sɚv/
UK /sɜ:v/
- Verb (Transitive/Intransitive)
- To act in a particular position or office
- To hit the first ball to an opponent in tennis etc.
A2TOEICMoreset out
US /sɛt aʊt/
UK /set aut/
- Phrasal Verb
- To arrange something in an orderly fashion
- To give in detail in writing
A1Moresit out
US /sit aʊt/
UK /sit aut/
- Phrasal Verb
- To refrain from participating in something.
- To wait until something ends.
A1Moresoggy
US /'sɑ:ɡɪ/
UK /'sɒɡɪ/
- Adjective
- Unpleasantly wet
C2TOEICMorespatula
US /ˈspætʃələ/
UK /ˈspætʃələ/
- Noun
- Hand tool used to mix or spread soft substances
- A turner with a narrow flexible blade
C1Moresplash
US /splæʃ/
UK /splæʃ/
- Verb (Transitive/Intransitive)
- To throw water or liquids in many directions
- Noun (Countable/Uncountable)
- Act of throwing water in various directions
B1Moresprinkle
US /ˈsprɪŋkəl/
UK /'sprɪŋkl/
- Transitive Verb
- To throw a little water on something
- To scatter (e.g. salt) in drops using the fingers
B2Morestart off
US /stɑrt ɔf/
UK /stɑ:t ɔf/
- Phrasal Verb
- To begin or commence something.
- To begin a journey.
B2Morestiff
US /stɪf/
UK /stɪf/
- Noun
- Slang term for a dead body
- Adjective
- Frozen still due to fear or anger
- Not able to be bent
B1Moresyrup
US /ˈsɪrəp, ˈsɚ-/
UK /ˈsɪrəp/
- Uncountable Noun
- Sugary liquid e.g. used on pancakes
B2Moretake on
US /tek ɑn/
UK /teik ɔn/
- Phrasal Verb
- To acquire a new characteristic
- To accept a new responsibility, role
A1Moretalking about
US
UK
- Phrasal Verb
- To discuss a particular topic.
- To be constantly mentioning or bringing up a subject.
A1Moretaste
US /test/
UK /teɪst/
- Uncountable Noun
- (Good) sense of style in clothes, art, or manners
- Flavor in your mouth from food or drink
- Verb (Transitive/Intransitive)
- To experience something
- To experience the flavor of food, drink
A2TOEICMoretexture
US /ˈtɛkstʃɚ/
UK /ˈtekstʃə(r)/
- Noun (Countable/Uncountable)
- Quality from different elements, as in music
- Look and feel of a substance or material
- Transitive Verb
- To give a particular look or feel to a surface
B1Moretiny
US /ˈtaɪni/
UK /'taɪnɪ/
- Adjective
- Very, very small
A2Moretip
US /tɪp/
UK /tɪp/
- Transitive Verb
- To pour or move something from a place, container
- To give extra money for good service
- Noun
- End point of e.g. a pencil or finger
- Extra money given for good service
A2Moreto let
US /tu lɛt/
UK /tu let/
- Preposition
- Indicates that a property is available for rent.
A2Moreturn out
US /tɚn aʊt/
UK /tə:n aut/
- Phrasal Verb
- To arrive for a public event or entertainment
- To happen to be in the end
A1Morevanilla
US /vəˈnɪlə/
UK /vəˈnɪlə/
- Adjective
- Having the taste of vanilla
- Having no special or extra features; ordinary or standard.
- Noun (Countable/Uncountable)
- Taste from seed of vanilla plant, as in ice cream
- Any orchid of the genus Vanilla, characterized by fragrant flowers and long pod-like fruit.
B2Morevary
US /ˈveri/
UK /ˈveəri/
- Verb (Transitive/Intransitive)
- To change something and make it different
- To be changeable, both up and down
A2TOEICMorewaffle
US /ˈwɑfəl/
UK /'wɒfl/
- Noun (Countable/Uncountable)
- Batter cooked in a hot iron, as with crisscrosses
- Intransitive Verb
- To speak incoherently and without a clear message
C1TOEICMorewhatnot
US /ˈwɑːt.nɑːt/
UK /ˈwɒt.nɒt/
- Noun
- Miscellaneous curios
- Uncountable Noun
- And other similar things
C1Morewhisk
US /hwɪsk, wɪsk/
UK /wɪsk/
- Transitive Verb
- To beat egg, etc. to add air and make it light
- Noun (Countable/Uncountable)
- A kitchen tool for beating food such as eggs to add air and make it light
B2Morewrap
US /ræp/
UK /ræp/
- Countable Noun
- Piece of clothing worn loosely on the shoulders
- Thin bread filled with food and rolled
- Transitive Verb
- To be or move around something
- To cover something with paper or a cloth e.g. gift
B1Moreyeast
US /jist/
UK /ji:st/
- Noun (Countable/Uncountable)
- A single-celled fungi used to make bread and beer
B2More
Vocabulary
- take on: To acquire a new characteristic
- look at: To use your eyes to focus on something
- to let: Indicates that a property is available for rent.
- start off: To begin or commence something.
- point out: To make others aware of an idea
- instead of: When one thing is replaced by another
- as well as: Also; in addition to
- in mind: Being aware of or considering something.
- turn out: To arrive for a public event or entertainment
- light on: To illuminate something.
- on the inside: Having a position of authority or influence within an organization or system.
- set out: To arrange something in an orderly fashion
- sit out: To refrain from participating in something.
- on hand: Present and available; in attendance.
- going on: To continue doing something
- off of: From a position on something; down from.
- for myself: Done for one's own benefit or use.
- for example: As an illustration or instance.
- have to: Must do
- hold on: To wait for someone (e.g. on a phone call)
- inside of: Within; in the inner part of.
- talking about: To discuss a particular topic.
- absolutely: Completely; totally; very
- effort: Amount of work used trying to do something
- gorgeous: Extremely attractive; richly beautiful
- wrap: Piece of clothing worn loosely on the shoulders
- texture: Quality from different elements, as in music
- fantastic: Strange or unusual in design or appearance
- separate: Being different from or unrelated to another
- tip: To pour or move something from a place, container
- fridge: An electric cool box for keeping food fresh
- tiny: Very, very small
- bit: Device put in a horse's mouth to control it
- fabulous: Almost impossible to believe, incredible
- pour: To fill a person's glass or cup with a drink
- syrup: Sugary liquid e.g. used on pancakes
- regular: Having an equal amount of space or time in between
- extract: Essential ingredient of a natural thing
- couple: To join something to something else
- counter: To say or do something in opposition or resistance
- rest: Time when one relaxes, sleeps, or is inactive
- soggy: Unpleasantly wet
- serve: To act in a particular position or office
- stiff: Slang term for a dead body
- plastic: Stiff but usually flexible man-made material
- handy: Convenient, easy to use, easy to reach
- fold: To bend one part of something against another
- combine: To mix several things together to form one thing
- pop: To cause something to open or burst suddenly
- pinch: A very small amount of something
- dough: Substance made from flour and water to bake bread
- vary: To change something and make it different
- splash: To throw water or liquids in many directions
- foam: Mix of a liquid and air to form a mass of bubbles
- taste: (Good) sense of style in clothes, art, or manners
- vanilla: Having the taste of vanilla
- make: To arrange or prepare something e.g. dinner
- activate: To cause to happen; cause a chemical reaction
- chop: To cut into pieces with an up and down motion
- rise: To wake up and get out of bed after sleeping
- melt: To disappear or to go away
- waffle: Batter cooked in a hot iron, as with crisscrosses
- set: Prepared for something; ready
- cover: To record a different version of another song
- expire: To breathe out
- sprinkle: To throw a little water on something
- rack: A frame, stand, hook on which things are hung
- whisk: To beat egg, etc. to add air and make it light
- spatula: Hand tool used to mix or spread soft substances
- drizzle: Light rain
- delightful: Greatly pleasing or entertaining
- yeast: A single-celled fungi used to make bread and beer
- machine: Piece of equipment used to do work
- lot: What happens to a person in life from chance; fate
- light: To cause something to burn; put a burning match to
- hear: To be aware of sound; to perceive with the ear
- maple: Any of various trees, some producing syrup
- put: To move or place a thing in a particular position
- dry: (Of humor) clever, but not obvious; ironic
- warm: To become more friendly or to like something
- hope: When you wish something will happen; what you wish
- love: Person's name
- ladle: Large spoon with deep bowl for serving e.g. soup
- whatnot: Miscellaneous curios
- dandy: Man who is far too interested in his clothes
- cameraman: Man who operates movie cameras as a job
- ohh: Expression showing surprise
Get the full experience in the app
Learn anywhere with detailed sentence and usage analysis
01:03
She took a brave step forward, leaving behind her comfort zone to chase her dreams.
Vocabulary
- brave
adj. Having courage
- comfort zone
phr. A familiar situation where one feels safe
Explanation
a brave step is a noun phrase, where brave is an adjective modifying the noun step, meaning "a courageous step".
forward is an adverb modifying step, meaning "ahead".
The whole phrase serves as the object, answering the "what" of took (verb) — she took a brave step forward.
Get the full experience in the app
Look up words anytime with pronunciation, part of speech, and usage
brave
US/brev/
UK/breɪv/
adj.Brave
v.t.To bravely face
A2 Elementary
Get the full experience in the app
Practice speaking anytime and get instant pronunciation feedback
Try this speaking exercise.
Try practicing with this sentence.
80
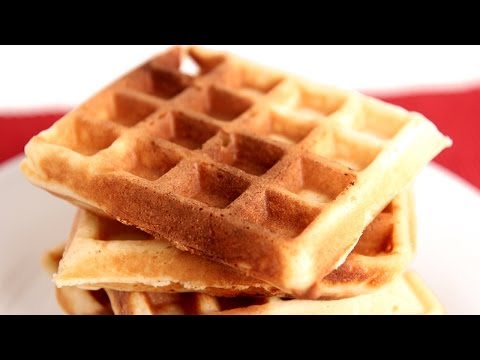
Belgian Waffles Recipe - Laura Vitale - Laura in the Kitchen Episode 782
0
YT Lin posted on 2017/01/01Craving delicious Belgian waffles but don't want the fuss? Laura Vitale shows you how to make amazing yeast-raised waffles that you can even make ahead and freeze! You'll pick up practical kitchen vocabulary and simple sentence structures perfect for everyday conversations.
Learn this video on the APP!
The VoiceTube App has more in-depth practice for videos!