
as well as
US /æz wɛl æz/
UK /æz wel æz/
- Adverb
- Also; in addition to
- Preposition
- In addition to; and also.
A1Morebrighten up
US /ˈbraɪtn: ʌp/
UK /ˈbraɪtn ʌp/
- Intransitive Verb
- To become more cheerful or lively.
- Phrasal Verb
- To make something brighter or more cheerful.
- To become brighter.
A1Morecut off
US /kʌt ɔf/
UK /kʌt ɔf/
- Phrasal Verb
- To end a process, e.g. a phone call
- To cut the end of something
- Transitive Verb
- To isolate or prevent access to a place or person.
- To interrupt someone while they are speaking.
A1Morecut out
US /kʌt aʊt/
UK /kʌt aut/
- Phrasal Verb
- To leave out of something, e.g. a social event
- To cut something from, e.g. a picture from a book
- Verb (Transitive/Intransitive)
- To stop doing or using something.
- To be naturally suited or fitted for something.
A1Morefix
US /fɪks/
UK /fɪks/
- Noun
- Answer to a problem
- Transitive Verb
- To arrange or prepare something
- To attach something so it will not move or change
A2TOEICMoreflat
US /flæt/
UK /flæt/
- Noun (Countable/Uncountable)
- Apartment; set of rooms for living in
- The smooth or level part of something
- Verb (Transitive/Intransitive)
- To share an apartment with someone
- To fail to produce the intended effect; to be unsuccessful or uninteresting.
A2Morego ahead
US /ɡo əˈhɛd/
UK /ɡəu əˈhed/
- Phrasal Verb
- To start an activity; start doing, working etc.
- To give permission to do something
- Intransitive Verb
- To start or proceed with something
- To proceed despite potential obstacles or doubts.
A1Morehang
US /hæŋ/
UK /hæŋ/
- Transitive Verb
- To attach a picture, photograph etc. onto a wall
- To kill by putting a rope around neck and dropping
- Intransitive Verb
- To float, move softly, or remain in the air
- To remain undecided, unsolved or unclear
A2Morehave to
US /hæv tu/
UK /ˈhæv tə/
- Auxiliary Verb
- Must do
A1Morelength
US /leŋθ/
UK /leŋθ/
- Noun (Countable/Uncountable)
- Distance from one end of a pool to the other
- Measurement of distance or of time
- Adjective
- Being long in extent.
A2Morelook at
US /lʊk æt/
UK /luk æt/
- Phrasal Verb
- To use your eyes to focus on something
- To focus your eyes on something carefully
A1Moreon the table
US /ɑn ði ˈtebəl/
UK /ɔn ðə ˈteibl/
- Phrase
- Located on the surface of a table.
- Available for consideration or discussion.
A1Morepair
US /per/
UK /peə(r)/
- Countable Noun
- Two of the same thing, e.g. socks
- Two people viewed together for some reason; couple
- Transitive Verb
- To put two things or people together
A2TOEICMoreroughly
US /ˈrʌflɪ/
UK /ˈrʌfli/
- Adverb
- Approximately; (of numbers) about; around
- In a manner that is violent or not careful
B1Morescrew
US /skru/
UK /skru:/
- Transitive Verb
- To cheat someone, as out of money/property
- To close something by turning it into place
- Countable Noun
- Long metal nail with a spiral thread
B1Moresharp knife
US
UK
- Countable Noun
- A knife with a keen edge or point for cutting.
A1Moresheet
US /ʃit/
UK /ʃi:t/
- Noun (Countable/Uncountable)
- Piece of cloth you put on the bed to sleep on
- Piece of thin flat metal, plastic or glass
A2Moretape
US /tep/
UK /teɪp/
- Transitive Verb
- To record some sounds using an electric device
- To stick things together using an adhesive strip
- Noun (Countable/Uncountable)
- Narrow strip of magnetic material for recording on
- Thin material used to mark an area or seal things
A2Morethread
US /θrɛd/
UK /θred/
- Noun
- Spiral cut at the end of a bolt
- A long, very thin, material used to sew cloth
- Transitive Verb
- To move yourself through a crowded or narrow space
- To put wire, string, etc. through a hole or needle
B1TOEICMorewrap
US /ræp/
UK /ræp/
- Countable Noun
- Piece of clothing worn loosely on the shoulders
- Thin bread filled with food and rolled
- Transitive Verb
- To be or move around something
- To cover something with paper or a cloth e.g. gift
B1More
Vocabulary
- cut off: To end a process, e.g. a phone call
- cut out: To leave out of something, e.g. a social event
- sharp knife: A knife with a keen edge or point for cutting.
- have to: Must do
- brighten up: To become more cheerful or lively.
- on the table: Located on the surface of a table.
- go ahead: To start an activity; start doing, working etc.
- as well as: Also; in addition to
- look at: To use your eyes to focus on something
- wrap: Piece of clothing worn loosely on the shoulders
- flat: Apartment; set of rooms for living in
- hang: To attach a picture, photograph etc. onto a wall
- screw: To cheat someone, as out of money/property
- roughly: Approximately; (of numbers) about; around
- sheet: Piece of cloth you put on the bed to sleep on
- top: To be higher or larger than a specific value
- fix: Answer to a problem
- cut: Act/instance of reducing the size or amount of
- pair: Two of the same thing, e.g. socks
- thread: Spiral cut at the end of a bolt
- length: Distance from one end of a pool to the other
- circle: A perfectly round shape
- tape: To record some sounds using an electric device
- paper: Academic writing or a talk on a specific topic
Get the full experience in the app
Learn anywhere with detailed sentence and usage analysis
01:03
She took a brave step forward, leaving behind her comfort zone to chase her dreams.
Vocabulary
- brave
adj. Having courage
- comfort zone
phr. A familiar situation where one feels safe
Explanation
a brave step is a noun phrase, where brave is an adjective modifying the noun step, meaning "a courageous step".
forward is an adverb modifying step, meaning "ahead".
The whole phrase serves as the object, answering the "what" of took (verb) — she took a brave step forward.
Get the full experience in the app
Look up words anytime with pronunciation, part of speech, and usage
brave
US/brev/
UK/breɪv/
adj.Brave
v.t.To bravely face
A2 Elementary
Get the full experience in the app
Practice speaking anytime and get instant pronunciation feedback
Try this speaking exercise.
Try practicing with this sentence.
80
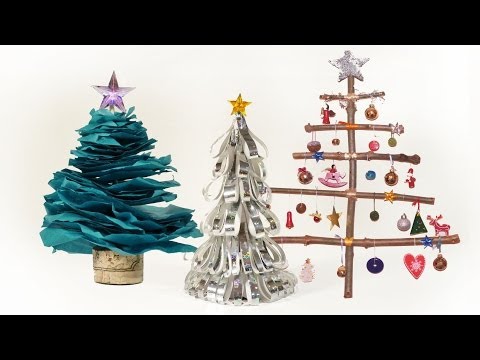
How to Make a Christmas Tree
0
Cheng-Hong Liu posted on 2014/12/26Want to add some festive cheer to your desk this holiday season? This fun video shows you three easy, beginner-friendly ways to make your own adorable Christmas trees using paper crafts and upcycled materials! You'll pick up simple sentence structures and practical vocabulary perfect for everyday conversations.
Learn this video on the APP!
The VoiceTube App has more in-depth practice for videos!