
at home
US /æt hom/
UK /æt həum/
- Phrase
- In one's own residence or country.
- Adjective
- Feeling comfortable and relaxed.
baby
US /ˈbeɪbi/
UK /ˈbeɪbi/
- Countable Noun
- A very young child, who cannot yet speak
- Transitive Verb
- To treat someone as if they were newly born
A2Moreboil
US /bɔɪl/
UK /bɔɪl/
- Intransitive Verb
- To become extremely angry or excited
- Transitive Verb
- To cook in very hot water
- To make liquids hot so they turn to gas
A2Morecontainer
US /kənˈtenɚ/
UK /kənˈteɪnə(r)/
- Noun (Countable/Uncountable)
- An object that can be used to hold things
- A large metal box used for transporting goods
A2Morecut in
US /kʌt ɪn/
UK /kʌt in/
- Phrasal Verb
- To interrupt someone's conversation
- To enter a queue at the wrong place
A1Morefor best
US /fɚ best/
UK /fə best/
- other
- An expression meaning ‘it is better to’ or ‘to do something for the best outcome’.
B2Morefreeze
US /friz/
UK /fri:z/
- Intransitive Verb
- To harden to a solid below zero degrees
- Transitive Verb
- To store an item of food in a cold place
- To make someone to not want to communicate
A2Morein half
US /ɪn hæf/
UK /in hɑ:f/
- Adverb
- Divided into two equal parts.
- Partially; to some extent.
A1Morein the refrigerator
US /ɪn ðə rɪˈfrɪdʒəˌreɪɾɚ/
UK /in ðə rɪˈfridʒəreitə/
- other
- Located inside a refrigerator to preserve or chill.
- other
- Put aside or postponed, not currently active.
A2Moreplastic
US /ˈplæstɪk/
UK /'plæstɪk/
- Uncountable Noun
- Stiff but usually flexible man-made material
- Adjective
- Being easily formed or shaped
A2Morerefrigerator
US /rɪˈfrɪdʒəˌretɚ/
UK /rɪˈfrɪdʒəreɪtə(r)/
- Countable Noun
- An electric cool box for keeping food fresh
- A container or room for keeping things cool.
B1Moresheet
US /ʃit/
UK /ʃi:t/
- Noun (Countable/Uncountable)
- Piece of cloth you put on the bed to sleep on
- Piece of thin flat metal, plastic or glass
A2Moresteam
US /stim/
UK /sti:m/
- Uncountable Noun
- Mist collecting on a surface when wet air cools
- Source of stamina, strength or energy
- Verb (Transitive/Intransitive)
- To cover a surface with steam, so as to clean it
- To cook in mist of tiny drops from boiling water
A2Morethrow out
US /θro aʊt/
UK /θrəu aut/
- Phrasal Verb
- To make someone leave, because of bad behavior
- To put in the garbage; discard
A1Moretray
US /tre/
UK /treɪ/
- Noun (Countable/Uncountable)
- A wide flat thing to carry food on
- Flat storage area of a truck
B1TOEICMoreused to
US /juzd tu/
UK /ˈju:st tə/
- Adjective
- Did regularly before, but don't do now
- Auxiliary Verb
- Have done before, but do not do now
A1Morewax
US /wæks/
UK /wæks/
- Intransitive Verb
- (Of the moon) to get bigger, like a full circle
- To speak emotionally about a particular memory
- Uncountable Noun
- Substance naturally produced inside the earhole
- Soft substance that melts, used for candles
B1TOEICMorewrap
US /ræp/
UK /ræp/
- Countable Noun
- Piece of clothing worn loosely on the shoulders
- Thin bread filled with food and rolled
- Transitive Verb
- To be or move around something
- To cover something with paper or a cloth e.g. gift
B1More
Vocabulary
- in the refrigerator: Located inside a refrigerator to preserve or chill.
- at home: In one's own residence or country.
- used to: Did regularly before, but don't do now
- in half: Divided into two equal parts.
- cut in: To interrupt someone's conversation
- for best: An expression meaning ‘it is better to’ or ‘to do something for the best outcome’.
- throw out: To make someone leave, because of bad behavior
- can: Able to; have the skill to; have the time to
- wrap: Piece of clothing worn loosely on the shoulders
- sheet: Piece of cloth you put on the bed to sleep on
- plastic: Stiff but usually flexible man-made material
- water: Clear liquid that forms the seas, rivers and rain
- food: What people and animals eat to live
- tray: A wide flat thing to carry food on
- boil: To become extremely angry or excited
- steam: Mist collecting on a surface when wet air cools
- container: An object that can be used to hold things
- wax: (Of the moon) to get bigger, like a full circle
- freeze: To harden to a solid below zero degrees
- baby: A very young child, who cannot yet speak
- refrigerator: An electric cool box for keeping food fresh
- paper: Academic writing or a talk on a specific topic
Get the full experience in the app
Learn anywhere with detailed sentence and usage analysis
01:03
She took a brave step forward, leaving behind her comfort zone to chase her dreams.
Vocabulary
- brave
adj. Having courage
- comfort zone
phr. A familiar situation where one feels safe
Explanation
a brave step is a noun phrase, where brave is an adjective modifying the noun step, meaning "a courageous step".
forward is an adverb modifying step, meaning "ahead".
The whole phrase serves as the object, answering the "what" of took (verb) — she took a brave step forward.
Get the full experience in the app
Look up words anytime with pronunciation, part of speech, and usage
brave
US/brev/
UK/breɪv/
adj.Brave
v.t.To bravely face
A2 Elementary
Get the full experience in the app
Practice speaking anytime and get instant pronunciation feedback
Try this speaking exercise.
Try practicing with this sentence.
80
0
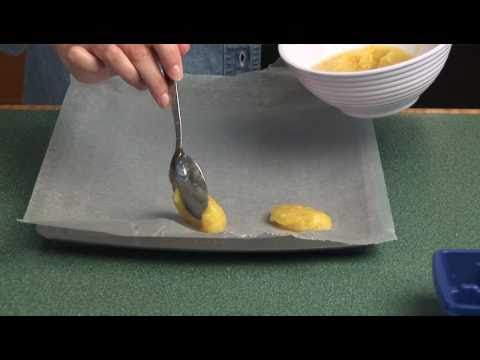
Furong Lai posted on 2012/12/14Thinking about making your own baby food? This video from the University of Maine gives you a super helpful step-by-step guide, focusing on things like peach puree and freezing tips! You'll pick up practical vocabulary for daily life and learn essential food safety knowledge, perfect for new parents!
Learn this video on the APP!
The VoiceTube App has more in-depth practice for videos!