Subtitles & vocabulary
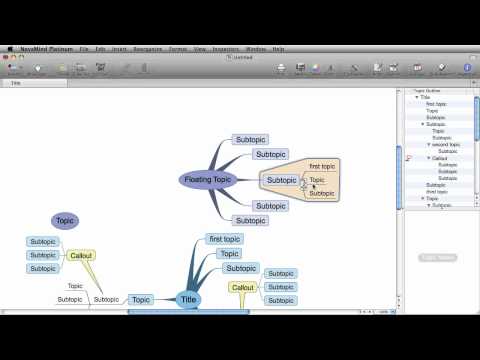
NovaMind 5 for Mac: Topics, Floating Topics, Shapes, Callouts, and Boundaries
00
Bensonwang posted on 2013/09/26Save
Video vocabulary

massive
US /ˈmæsɪv/
・
UK /ˈmæsɪv/
- Adjective
- Very big; large; too big
- Large or imposing in scale or scope.
B1
More context
US /ˈkɑnˌtɛkst/
・
UK /ˈkɒntekst/
- Noun (Countable/Uncountable)
- Set of facts surrounding a person or event
- The circumstances that form the setting for an event, statement, or idea, and in terms of which it can be fully understood and assessed.
A2
More multiple
US /ˈmʌltəpəl/
・
UK /ˈmʌltɪpl/
- Adjective
- Having or involving more than one of something
- Having or involving several parts, elements, or members.
- Countable Noun
- Number produced by multiplying a smaller number
- A number of identical circuit elements connected in parallel or series.
B1
More Use Energy
Unlock Vocabulary
Unlock pronunciation, explanations, and filters

