Subtitles & vocabulary
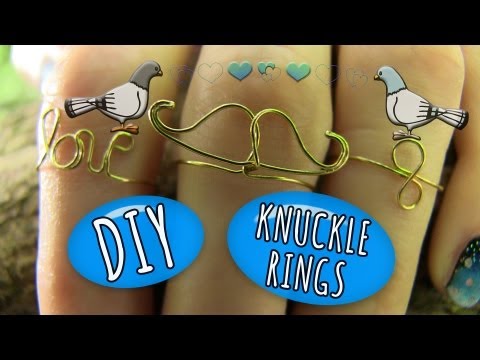
DIY Wire Rings! How to Make Wire Rings Jewelry (3 Ring Designs - Moustache, Infinity and Love)
00
pon posted on 2017/08/17Save
Video vocabulary

episode
US /ˈɛpɪˌsod/
・
UK /'epɪsəʊd/
- Noun
- One separate event in a series of events
- Show which is part of a larger story
B1TOEIC
More sort
US /sɔrt/
・
UK /sɔ:t/
- Transitive Verb
- To organize things by putting them into groups
- To deal with things in an organized way
- Noun
- Group or class of similar things or people
A1TOEIC
More adorable
US /əˈdɔrəbəl,əˈdor-/
・
UK /əˈdɔ:rəbl/
- Adjective
- Lovable or appealing, e.g. like a cute child
B2
More Use Energy
Unlock Vocabulary
Unlock pronunciation, explanations, and filters

