Subtitles & vocabulary
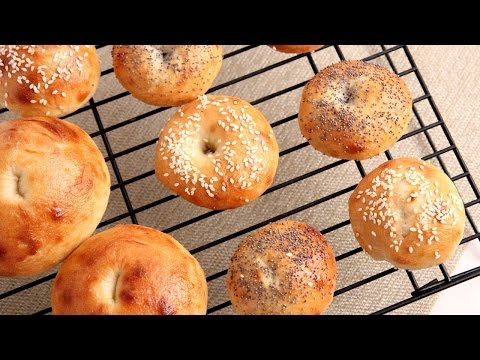
How To Make Bagels | Episode 1029
00
amber posted on 2016/05/25Save
Video vocabulary

purpose
US /ˈpɚpəs/
・
UK /'pɜ:pəs/
- Noun (Countable/Uncountable)
- Reason for which something is done; aim; goal
- A person's sense of resolve or determination.
- Adverb
- With clear intention or determination.
- Intentionally; deliberately.
A2TOEIC
More roll
US /rol/
・
UK /rəʊl/
- Countable Noun
- Small, round piece of bread for one person to eat
- Photographic film wrapped round and round itself
- Verb (Transitive/Intransitive)
- To continue along as time normally progresses
- To produce a very deep and continuous sound
A2TOEIC
More sheet
US /ʃit/
・
UK /ʃi:t/
- Noun (Countable/Uncountable)
- Piece of cloth you put on the bed to sleep on
- Piece of thin flat metal, plastic or glass
A2
More perfect
US /ˈpɚfɪkt/
・
UK /'pɜ:fɪkt/
- Adjective
- So good it cannot be improved
- Exactly suitable; ideal.
- Transitive Verb
- To do something so well, it cannot be done better
A1TOEIC
More Use Energy
Unlock Vocabulary
Unlock pronunciation, explanations, and filters

