Placeholder Image

Subtitles section Play video

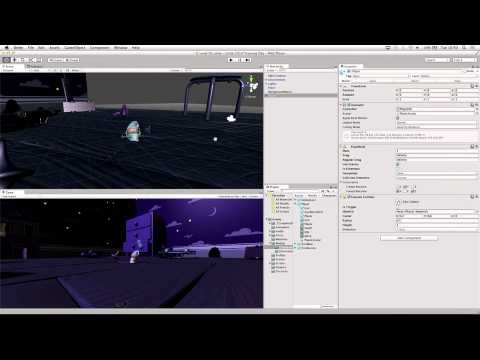
  • So what we're going to do is setup our player now

  • which is going to get him moving and jazzing and

  • beboping and doing all that stuff.

  • What we're going to do is we're going to go ahead and locate

  • the player model, which is going to be located

  • in Models folder, and we're going to

  • expand that and we're going to look in the Characters folder

  • and we should see a player,

  • there we go, Player, it should be right there.

  • So what we're going to do is we're going to go ahead and

  • drag that either in to the scene or in to

  • the hierarchy view.

  • So we'll just click and drag and drop and there he is.

  • There he is, looking pretty swag.

  • And so obviously if we just click and drag him to the scene he might

  • go where ever, you know, so we need to

  • place him at a specific spot so we're going to be sure that

  • the position is at (0, 0, 0).

  • If it is then you're golden, if it's not then

  • go ahead and set it to (0, 0, 0)

  • by typing (0, 0, 0) or again we

  • have this cog or gear icon

  • and you can just click reset or reset position,

  • which will put it where ever we want it to be on the origin.

  • Now we need specific things to

  • interact with the player in a very special way.

  • And so we want to ensure that we have properly

  • tagged our player so certain things will know

  • when they've come in contact with the player.

  • To do that we have this Tag drop down

  • here in the inspector and it currently says Untagged.

  • And what we're going to do is we're going to click that drop down

  • and we are going to select Player.

  • Thus tagging our player

  • as the player so that the player will

  • behave appropriately when they are playing.

  • Alright, fantastic.

  • Now what we need to do is

  • we're going to go ahead and create

  • an animation controller for our player,

  • which is going to allow us to

  • have all the neat little

  • animation effects of moving and turning and

  • doing all that stuff,

  • and I'm still zoomed in here.

  • So what we want to do is we want to go ahead and

  • locate the Animation folder

  • which we'll just click on right here.

  • Currently it is in fact empty and we are going to make

  • an animator controller.

  • Shall we just talk a little bit about the

  • animations that we've setup first?

  • Great idea!

  • Cool. So the model that we've just dragged in

  • is the player model and what you can do is drag up

  • the preview window in the lower right of the editor.

  • So this model has been animated

  • for you, so when you bring in an FPX

  • in to Unity, or a Maya file

  • or a 3DS Max, whatever package you use,

  • When you bring that in you can

  • store animations within it or if you have

  • a humanoid, a biped-type model

  • you can retarget those animations on to

  • similar type of models.

  • This particular thing is rigged

  • in what we call a generic manner.

  • So if I look at my rig you can see generic up at the top.

  • And what that means is that it's a very specific

  • bone structure because our character is going to move like this.

  • It's going to be kind of hopping around.

  • So he's not got two arms, two legs as a biped would.

  • So the animations that are stored in this

  • particular model that we've given you

  • are a move, an idle and a death.

  • So what we're going to do now is to create

  • a state machine called the Animator Controller

  • to control when these three different

  • animations are going to be played back.

  • If you're looking in the inspector here

  • I highly encourage you not to

  • touch anything.

  • Because these changes change how Unity

  • imports the stuff and if you just start clicking

  • and a little box comes up and says 'would you like to apply?'

  • and you're like 'yeah, apply for what?'

  • and then all of a sudden your stuff is not going to

  • work later, so just look but don't touch.

  • So we're doing this just to

  • show your where the animation's going to be

  • coming from and we're going to go ahead and

  • actually implement it now.

  • We're going to go back to this animation folder

  • and again it's still empty so

  • no magic there yet.

  • And we're going to go ahead and add what's called

  • an animator controller.

  • Animator controllers are part of the mecan animation

  • system, they're basically a finite state machine that just

  • blends animations and does all this neat stuff,

  • it's actually magic, we hired wizards.

  • And what we're going to do is we're going to go ahead and

  • create this asset that's going to allow us to do that.

  • So I'm going to right click here inside

  • this animation folder in the project view here

  • and I am going to select

  • Create and then Animator Controller.

  • Not Animation, not Animator Override Controller

  • but Animator Controller.

  • And I'm going to get this name here and I'm going to name it

  • Player AC for Animator Controller.

  • There we go.

  • And so once we have that what we're

  • going to do is we are going to

  • actually just click and drag that on

  • to the player, which is going to apply this animator

  • controller to the player,

  • I'm not going to put it under the player

  • I'm going to put it on the player and you'll know the difference

  • because Player itself will become highlighted.

  • And I'll let go.

  • I can confirm I did this correctly be clicking on the player

  • and I see here Player AC

  • is now listed in the animator

  • component, Player AC, right there.

  • That's how I know I've done it correctly.

  • Now let's go ahead and look at this animator controller,

  • now that we have it created,

  • and to do that I can go to Window

  • and then select Animator

  • but easier is to

  • see my Player AC and just double click on it,

  • which is automatically going to open up the animator window.

  • If it's not docked here

  • you can just dock it by clicking the

  • tab, dragging it and docking it in to the window.

  • So as we were looking at earlier

  • when Will clicked on the player

  • FPX model and we looked in the inspector and we saw

  • those animations that were baked in to those settings.

  • Those actually create assets that we're able to use.

  • So if I go back to the Model's

  • character's folder right here.

  • and again look at my player.fpx.

  • If I were to expand that I would

  • see the assets that make up

  • this imported model

  • and so I'm going to go ahead and click this model here

  • and what I see is I see these three animations

  • death, idle and move.

  • So not only were the animations imported

  • as part of the model but we actually have them assets

  • that we can utilise.

  • And so what I'm going to do now is I'm actually

  • going to just take each of these in turn

  • and move them in to my

  • animator window, I'm just going to click and drag them,

  • and drop them

  • I'm just going in order here so I'm going to do death,

  • idle and move, the order's not going to matter because

  • we're going to reorder them in just a moment.

  • So when you have this done right

  • you'll see that you have this Any state

  • and a Death state and an Idle state and a Move state.

  • And so we'll notice that the death state is

  • orange, or which ever state you drag in first

  • is orange, right?

  • Orange means that it's the default state.

  • Obviously I do not want death as the default state

  • It's a sad game but it's not that sad.

  • And so what I want to do is

  • I am going to set a different state

  • as our default state, so I am going to right click

  • on Idle and I'm going to click

  • Set As Default.

  • So that will then turn orange.

  • And I can reorder by clicking and dragging and moving

  • things around, if you just happened to be very particular

  • about how things look you can start

  • building yourself some geometric structures if you really

  • feel like it, whatever.

  • Anyway, now we have idle as the

  • default state and so what we need to do

  • is we need to

  • tell the animator

  • when we want to transition from one

  • state to another state.

  • So we've got these three states, idle, move and death.

  • And they're self-contained animations, they can play and all that stuff but

  • the logic of when we go from one

  • to the next isn't currently in here.

  • So what we need to do is we need to create something

  • called a parameter which is basically going to control

  • when something happens,

  • when something changes state.

  • And we access those parameters right here

  • with this little Parameters button

  • it's very cleverly named,

  • and we have this little + icon right there.

  • What we want to do is we want to create a parameter

  • so the first parameter we're going to create,

  • when we click this we're going to see some options

  • we can create a float, as in a floating point number,

  • int is an integer, bool is a boolean

  • or trigger, we want to create a boolean

  • and we're going to call this IsWalking.

  • It's very important that you spell it right

  • like I just did not.

  • There we go, IsWalking,

  • and then enter.

  • It has to be capital I

  • lowercase s, capital W alking.

  • alright, it's important that it's spelt

  • right because we have scripts that you're going to use

  • that reference it by name

  • so if you named it something else, like Skeletor,

  • when the time comes it's not going to work

  • you'll just have to open up your code and change it

  • which you really don't want to do.

  • So we have this IsWalking which is a boolean which

  • means it can be either true or false

  • and that true or false will dictate whether

  • he is walking.

  • I'm going to create another one now so again I'm going to click

  • this little + icon and I'm going to select

  • Trigger, and a trigger is like a boolean.

  • It can have a state True or False

  • but unlike a boolean the moment we set it to true

  • it sets it back to false.

  • Which is useful when I just want to

  • trigger something to happen one time and then it resets itself.

  • So we're going to select a trigger here

  • and this trigger is going to be

  • called Die.

  • We listened to a lot of heavy metal while making this.

  • So die is a trigger that's going to

  • be triggered when the player

  • actually dies.

  • Now what we want to do is

  • we have these parameters which is

  • great but now we need to tell

  • mechanim and the animator specifically how to use

  • those parameters, we need to set up some logic

  • to move us from one to the next.

  • So what we want to do is we want to setup

  • transitions that basically says

  • 'this state is capable of going to that state'

  • and 'this state is capable of going to that state'.

  • We set up these transitions explicitly

  • so that we can't accidentally transition from

  • say Dead to Jump,

  • because that doesn't make a whole lot of sense.

  • So what we want to do is create these

  • transitions which basically are one-way bridges

  • that define logically how

  • we go from one state to another.

  • So what I'm going to do is I'm going to right click on Idle

  • and I'm going to select Make Transition.

  • And when I click Make Transition I get this

  • rodeo lasso thingy

  • which is fun to play with by itself,

  • but we're here for business,

  • so what I'm going to do is once I've confirmed that

  • there's this white line attached to my mouse

  • I'm going to move my mouse over the Move

  • animator state and I'm just going to click

  • and it's going to connect the two.

  • So now what we have is a transition from idle to move.

  • See, there you go in case you didn't believe me.

  • And so this is basically saying that we

  • can go from idle to move.

  • So what I'm going to do now is in order to

  • actually dictate when that happens

  • I have to click on the transition.

  • Too close.

  • There we go.

  • I'm going to click and you'll see it turn blue

  • and so now I have selected

  • the transition between the two.

  • And once I've done that over in the inspector view we get

  • the properties of this transition

  • and what I'm interested in is

  • is down on the bottom we have these conditions.

  • What is the condition of this transition?

  • And so what I'm going to do is

  • click this drop down that says Exit Time

  • and I'm going to select IsWalking

  • and I'm going to leave that as true.

  • So the way you read this is you are transitioning

  • from idle to move when IsWalking

  • equals true.

  • So now what I'm going to do

  • is I'm just going to do the exact opposite,

  • so I'm going to right click on move

  • make transition, get my fun rodeo arrow,

  • now I'm going to click on idle,

  • so this is stating that I am able to move

  • from the move state back to the idle state.

  • and I'm sure that you can all guess what

  • the condition for that is going to be but we'll

  • go through it anyway, I'm going to select Conditions

  • IsWalking equals false.

  • So if the player is walking we play the walking animation.

  • If the player is not walking we don't,

  • we play the idle animation.

  • Finally what I want to do is

  • I am going to create one more transition,

  • this time we want the player to be able to die.

  • So to do that we're not going

  • to transition from idle or move or death

  • because we can theoretically die

  • in any state depending on whichever animation is

  • currently going on.

  • So we are going to use the Any state.

  • And by that I mean the actually green any state,

  • I don't mean you're going to transition from any state you want.

  • So the one that says Any state.

  • So I'm going to right click on that and

  • I only have one option and that's Make Transition

  • and I am going to transition from

  • Any state to Death, so no matter what state

  • you're currently in if you die, you die.

  • I'm going to select that transition,

  • you'll see it turn blue

  • and I'm going to set my condition to be

  • Die.

  • Now since it's a trigger I don't need to

  • specify true, false or a value like that,

  • it's just if Die get's triggered

  • we immediately switch in to the death animation.

  • The next thing we need to do with this player character

  • is to give him a physical presence in the scene.

  • So if you change from your animator window

  • back to the scene view using the tab at the top

  • then you can select the player.

  • We're going to add a rigidbody.

  • A rigidbody component is something that allows

  • the physics engine of Unity to be applied to the object.

  • We are going to click Add Component

  • and choose Physics

  • and Rigidbody.

  • It's important that you don't select Physics 2D

  • Rigidbody 2D, we're doing 3D physics

  • so just physics.

  • So then what we're going to do, because we don't want

  • this to slow down over time

  • we're going to set the drag and angular drag

  • to infinity.

  • So you can do this actually by just typing

  • INF in the drag box and hitting return.

  • If you've done it correctly you'll see a capitalised

  • infinity.

  • We do want to use gravity, we want to keep the player

  • firmly grounded, despite this being a dream sequence.

  • And we do want to use

  • constraints, so basically we're going to use

  • constraints to ensure that the player

  • character doesn't fall forward or fall over any

  • different directions, and we also want

  • to freeze the Y position so he doesn't sink through the floor

  • or jump up or anything like that.

  • In Freeze Position we're going to choose the Y coordinate

  • and Freeze Rotation X and Z or Zee.

  • You'll have to expand constraints if it's not currently expanded.

  • Yep, sorry, you need to expand constraints,

  • if you can't see those properties you should see them

  • at the bottom.

  • Next we need to make sure things can actually

  • bump in to the character because currently

  • he reacts to physics

  • but if he doesn't bump in to anything

  • nothing's going to happen.

  • So if you go to Add Component

  • and then Physics

  • and then there's a capsule collider along with

  • all the other colliders there.

  • We need to give it specific settings

  • so we make sure that the capsule covers the player.

  • So if you change the centre

  • to 0.2 in the X

  • 0.6 in Y and leave the Z as 0

  • or Zee a 0.

  • We also need to change the height

  • to 1.2, so what that's going to mean is that

  • this sort of leaning over character thing here

  • he's got a little bit of an X offset so that the

  • capsules going to cover him nicely.

  • Next we need the player to make

  • a little yelping sound when he gets hurt.

  • So we're going to add an audio source

  • component, so if you go to Add Component

  • Audio, and then find Audio Source

  • and we're going to change

  • the audio clip from None, using the little

  • circle select by it

  • to Player Hurt.

  • When it opens the context sensitive menu

  • you can see Player Hurt there.

  • One thing about the selection window is

  • that you can double click to close

  • it at the same time, if you want to assign something

  • you can open up the circle select, double click

  • will also close the window.

  • Once other thing I'm going to quickly do because we've got these

  • settings done is I'm going to close the rigidbody

  • or collapse it up using the arrow next

  • to it just so that we can see the ones below it.

  • We do not want the player to make a yelp sound

  • on awake, so we're going to uncheck Play On Awake

  • You'll know that if you haven't unchecked that

  • when you start the game it'll go 'oh'.

  • If it does that go back to this

  • and uncheck Play On Awake.

  • So we're going to find the Player Movement script

  • and that's in the Scripts - Player folder.

  • So if you look in the project panel, find Scripts, expand that

  • and then click on Player, you'll see on the right

  • hand side the different player scripts that we've got.

  • We've got an empty class called

  • Player Movement and we're going to go through

  • making that now.

  • You can assign a script a number of different ways.

  • A script is just a component

  • like any other component.

  • But what we're going to do is we're going to drag and drop

  • for this one, so I'm going to grab

  • my Player Movement script, I'm going to drag it

  • up and drop if on to the player game object.

  • When that's done you should see that it appears

  • as a component at the bottom of the list.

  • Be sure to save your scene before we go on to this next part

  • too because we're in the beta software.

  • So first of al double click it for opening and

  • you should get mono develop to come up.

  • There's a number of different ways to open a script.

  • You can either double click the icon

  • in the project panel, you can

  • click open with it selected

  • at the top of the inspector.

  • Or one final way is to, when it's

  • applied as a component

  • you can actually click the cog icon and choose

  • Edit Script.

  • If you give it a moment it's going to open up that

  • script editor for Unity which is

  • Mono Develop.

  • All of this is going to be done within

  • the class, so you notice there's a pair

  • of early braces, or brackets?

  • What we're going to start off by doing is

  • making some variables

  • that we can adjust throughout the course of class.

  • We're always going to start off with our public ones at the top.

  • and then underneath with private ones.

  • So we'll start off with a public float

  • called Speed, which is obviously

  • going to control how fast the player is.

  • I'm going to give it a default value of 6.

  • So the F on the end there is just

  • saying that this is a floating point variable.

  • Now we move on to the private variables.

  • So I could go ahead and type

  • vector3 because vector2 is the first thing it suggests

  • I could accidentally press return and get that

  • but I don't, I want a vector3 type of variable.

  • So these variables we're declaring

  • the type of them first, if you're familiar with Java Script

  • you'll remember that it does it the other way round.

  • So in C# we say the type of variable first

  • and then the name.

  • So this one's going to be called Movement and

  • we're going to use that to store

  • the movement that we want to apply to the player.

  • The next one we're going to have a reference

  • to the animator component

  • and we'll call that Anim.

  • We're also going to have a reference to

  • the rigidbody component

  • and we'll call that Player Rigidbody.

  • So the next one is an integer

  • called Floor Mask, now I'm going to explain this one.

  • If you remember earlier we made that floor

  • quad, that big square that we just left

  • on the floor, that's the thing that we want to raycast

  • in to and the way we tell our raycast

  • that we only want to hit that floor is we use

  • a layermask, which is stored as an integer.

  • If I hit save right now, basically we designed

  • this project on a PC,

  • we've opened it on a Mac,

  • files have different line endings, it doesn't matter

  • at all, just hit Convert, everything will be fine.

  • So the last private variable that we're going to make

  • is a float

  • called camRayLength.

  • That's going to be the length of the ray

  • that we cast from the camera,

  • and we're going to give that a value of 100.

  • The next thing that we're going to do is setup

  • those references.

  • We're going to setup the references

  • in the awake function

  • Some of you will be familiar with

  • the start function, awake is very similar

  • but it gets called regardless of whether

  • the script is enabled or not.

  • So it's good for setting up references and things like that.

  • We're going to start off by setting

  • up our floor mask

  • and we're going to use LayerMask.GetMask

  • so then we can parse in a string

  • which is just a word or a sentence

  • of the layer that we're going to get.

  • So we put the floor quad

  • on the floor layer so we're going to get mask from floor.

  • Then we're going to use GetComponent to

  • get the references to the animator, like that.

  • You'll notice a little angled brackets there,

  • that's just denoting the type of what we're looking for.

  • In this case we're looking for an animator so we write .

  • If we were looking for a rigidbody we'd write and so on.

  • So we write here.

  • And that's all we need to do to setup the references.

  • Next what we're going to do is

  • put a call to fixed update.

  • Fixed update is a function

  • that Unity will automatically call on it's scripts

  • that fires every physics update.

  • Unity runs on a number of updates.

  • The normal update system that you're familiar with

  • runs along with rendering.

  • The fixed update runs with physics.

  • So since we're moving a physics character

  • he's got a rigidbody attached we're going to

  • use fixed update to move him.

  • So what we're going to do is get the input

  • from the horizontal and vertical axis,

  • but we're not going to get the standard input,

  • we're going to get the raw input.

  • So whereas a normal axis would have values

  • varying between -1 and 1

  • the raw axis will only have

  • a value of -1, 0 or 1.

  • It won't have any variation in between those.

  • So what that means is that

  • when we're controlling the character, rather than him

  • slowly accelerating towards it's full speed

  • he's going to immediately

  • snap to full speed, which will give us a much

  • more responsive feel.

  • Just so you know, an axis is actually input.

  • So these axis, horizontal

  • vertical, jump, fire1, fire2,

  • those are defaults within Unity,

  • so if you're wondering what horizontal is it's

  • already in there.

  • So the horizontal axis basically maps

  • to the A and D keys

  • as well as the left and right arrow keys.

  • Either of those manipulate the horizontal axis.

  • Pressing the A key gives me a value of -1

  • in the horizontal axis, pressing the D key

  • gives me a value of 1 in the horizontal axis.

  • Vertical is another axis, it's the W and S keys

  • as well as the up and down arrows.

  • Fire1 is your left mouse button

  • or right control, so on and so forth.

  • If you're curious you can go in the input manager,

  • I think Will had that up there a second ago

  • and that's where these axis exist and how we set them up.

  • But the ones we're all using here are defaults

  • so there's nothing special that you need

  • to do to get those.

  • Go ahead and put in the vertical axis as well,

  • we're storing that as a float called V,

  • so these are private variables within

  • fixed update so we can use

  • them within specifically fixed update.

  • So remember that the variables that we created earlier

  • are outside of these functions so we can use

  • them within any of the functions in this script.

  • Fixed update and awake are automatically

  • called by Unity, they're mono-behaviour functions.

  • But we can also make our own functions

  • that we can call within those fixed update and awake.

  • What we're going to do now is create a

  • move function that we can call in fixed update later

  • to move our character.

  • We're basically going to split up the actual

  • operations of those player movement script

  • in to movement, turning and animation.

  • We're going to put them in to separate functions

  • to keep them all modular.

  • If you make a Move function

  • that's going to have 2 parameters,

  • a float called H

  • and a float called V

  • and unsurprisingly those are going to be the input

  • that we'll parse in to this function when we call it.

  • We have this movement vector that we stored

  • earlier and we want to set the value

  • of that, so if you type movement.set

  • then you get the chance to put each of the

  • X, Y and Z components of those

  • so we're going to use H for it's X component.

  • We don't want any vertical components so we're

  • going to put that as 0.

  • We're going to use an F because it's a floating point.

  • And then V for the Z component, so what that means is

  • X and Z are flat along the ground.

  • The horizontal and vertical movement that we give it

  • will translate to lateral movement in the game.

  • Now we've set that we have a bit of a

  • problem because if you move

  • just in the Z axis or just in the X axis

  • then you've got a value of 1,

  • like a size of 1 for that vector.

  • However, if you use both then

  • the length of the vector is different,

  • it's 1.4,

  • so we need to change that so that you don't

  • get an advantage by moving diagonally.

  • What we want to do is normalise that.

  • So what that means is it's going to take

  • a direction that we have

  • but it's going to make sure that the size is always 1.

  • Effectively make sure that the player moves at the same speed

  • regardless of which key combination you use.

  • We don't want it to move at a speed of 1, we want it to

  • move at our speed, so we're going to times

  • that by our speed variable that we stored.

  • Also, this is called fixed update.

  • So we don't want it to move at

  • 6 units per fixed update,

  • it would move 6 units every 50th of a second

  • and we wouldn't see our player ever again,

  • so instead we're going to change it so that it's

  • per seconds and the way we do that is by

  • multiplying by Time.DeltaTime.

  • DeltaTime is the time between each update call.

  • So if you're moving it by that much

  • per 50th of a second

  • over the course of 50 50ths of a second

  • it is going to move 6 units.

  • So finally in this function the last thing we need to do is

  • apply that movement to the player.

  • So we're going to do that using a rigidbody function

  • called MovePosition.

  • So MovePosition moves a rigidbody

  • to a position in world space.

  • So we need to move it relative

  • to the position that the character currently is.

  • We need to add our movement

  • to the player's position, the transform.position + movement.

  • So it's going to be it's current positions plus

  • this input that we've given him to move him

  • slightly further along.

  • The next thing that we're going to do is look at the

  • turning of the character.

  • Again we're going to make a new function.

  • This time we're going to call it Turning.

  • We don't require any parameters for this.

  • Because the direction the character

  • is facing is based on the mouse input

  • rather than the input that we've already stored.

  • The first thing that we're going to do is create

  • a ray that we cast

  • from the camera in to the scene.

  • Let's have a little look at how that actually works first.

  • If you have a look at this diagram we have

  • a representation of the camera,

  • the screen and the level plus the floor quad around the level.

  • So that box that you're looking at there

  • is effectively your level,

  • the floor quad is around that

  • and the camera, if you think of the camera as

  • something that's looking from where you're

  • looking at the game on the screen

  • forward on to the game level

  • you cast a ray, a single invisible line from that point

  • to the floor quad to get a particular position back.

  • And we want to use that because we want the

  • character to turn and face the

  • point of wherever the camera's looking.

  • So when you move the mouse around in the game

  • he's going to turn around and face that position

  • so that you can turn around and also shoot

  • in a particular direction.

  • So we see this end bracket on line 40,

  • make sure that's there.

  • It's a real quick gotcha that everyone always does is they

  • move their functions down outside of the class

  • by accident, so if you have

  • avoid Turning with your open and closed brackets

  • and you don't have another bracket immediately after that

  • you've missed one.

  • And don't just add another one

  • because then you're going to have one in the wrong spot

  • and another one in the wrong spot.

  • Instead just move that function back

  • up so that it is inside the class.

  • The first thing we're going to do in this function is

  • we're going to create a ray.

  • So we'll call that camRay,

  • a ray coming from the camera.

  • And we're going to use a function of

  • the camera, the main camera called

  • ScrenPointToRay.

  • So what that's going to do is take a point on

  • the screen and cast a ray

  • from that point forwards in to the scene.

  • So the point that we're going to give it

  • is the mouse position.

  • So it's always going to find the point

  • underneath the mouse if you imagine.

  • So if you're looking at the game,

  • there's a mouse on your screen, the point underneath that

  • mouse is the point it's going to find

  • if that hits the floor quad.

  • We need to get information back when we

  • do this raycast and in order to get

  • information back from this raycast

  • we need a RaycastHit variable,

  • so that's what we're creating here.

  • The next stage is to actually

  • cast the ray that we've created.

  • So we created this imaginary invisible line

  • and now we need to actually perform the action

  • of casting the ray

  • so that it can hit something.

  • A raycast function will return

  • true if it has hit something

  • and it will return false if it hasn't

  • So we're going to put that inside and If statement.

  • And if it has hit something

  • then the code within the If statement

  • will be carried out.

  • If it hasn't hit anything then the code within

  • the If statement won't be carried out

  • so we'll just skip out of this function.

  • That's what that little If at the start there is for.

  • So we need to give this a number of parameters.

  • Let's start off with the ray itself, that's the

  • positions and directions of the cast that we're going to have.

  • We need to use an Out variable

  • for the floor hit, so Out means

  • that we're going to get information out of

  • this function and we're going to store it

  • in that floorHit variable.

  • Next we need to give it a length,

  • so how far are we going to do this raycast for?.

  • And that's the variable camRayLength that we store earlier.

  • And finally we want to make sure that this raycast is

  • only trying to hit things on the floor layer.

  • That's that floor mask that we created earlier.

  • Remember that since this is an If statement

  • and a function there should be

  • two closed braces at the end there.

  • So if you see you've got if (Physics.Raycast (

  • and then at the end we need to close both of those brackets again.

  • Okay so we've got the open curly braces afterwards

  • and this will be the code that's carried out

  • if we've hit something, so we need to

  • create a vector3 from the

  • player to where the mouse has hit.

  • And that's the floorHit.Point,

  • so that's the point that it's hit the floor

  • minus transform.position, that's the position of the player.

  • We're going to apply this

  • to the character to make him turn

  • but we don't want him to sort of start leaning back

  • so we need to make sure that the Y component

  • of this vector is definitely 0.

  • Now we can't set a player's rotation based on

  • a vector so we need to change that

  • from a vector in to the

  • horrible word, quaternion.

  • So quaternion basically speaking is

  • a way of storing a rotation.

  • We have a vector3 but we can't

  • use that to store a rotation so we use a

  • quaternion and we're going to create one called newRotation

  • and quaternions are also a class

  • that has a number of functions of

  • which we're going to use one called LookRotation

  • So what lookRotation does, the default for

  • characters and cameras and things like that

  • in Unity and in most 3D modelling

  • is that the Z axis is their forward axis.

  • So we want to made the playerToMouse vector

  • the forward vector of the player.

  • So that's all that this function is doing

  • when we give it the playerToMouse.

  • When we actually have to apply it so we're going to

  • address the player rigidbody.

  • I'm going to use the moveRotation function

  • and since we don't want to give it an offset

  • we're trying to give it a completely new rotation.

  • We're just going to assign it like that, we don't need to do

  • transform.rotation + newRotation,

  • it's just this rotation.

  • So that's our turning, the next and final function of this,

  • we're going to look at the animation.

  • After the turning we're going to make another function

  • called Animating.

  • Now we do need to give this the

  • H and V parameters because

  • whether or not the player is walking

  • or idle is dependent on the input.

  • So what we're going to do is we're going to create

  • a boolean variable called Walking.

  • And we need this to be true

  • if either the H variable

  • or the V variable has some value.

  • If it's 0 then

  • there's no input on that axis

  • and we don't need to worry about it.

  • But if either H or V has

  • a value that's non-0 then

  • it's true and the player is walking.

  • So what that complicated bit of code there is doing

  • is saying that first of all H

  • is that not equal to 0?

  • That will return either true of false

  • depending on whether it's 0 or not 0.

  • Or

  • is V not equal to 0?

  • What this is basically saying is 'hey, did we

  • press the horizontal axis or did we

  • press the vertical axis'?

  • If we pressed either of those we're walking.

  • If we didn't we're not.

  • So the reason we're doing that is we want to

  • parse this to our animator component

  • so you'll remember we made a parameter called IsWalking.

  • And the way that we set that is we say

  • anim, so our reference to the animator component,

  • Set.Bool, so we made a parameter which

  • was a type bool, a boolean, true or false.

  • And it was called IsWalking.

  • So first to actually set this

  • we tell it which one so the IsWalking parameter

  • and then we give it a value, so we could here write true or false

  • but we want to use Walking, the variable

  • that we just made.

  • So the very last thing that we need to do in this class

  • is we need to put, so we need to put

  • calls to those functions that we've made.

  • Currently they're just functions sitting there by themselves.

  • We need to make sure that those functions are

  • actually being called an actually being used.

  • These three functions aren't happening

  • until we tell them to, we haven't actually

  • called them anywhere in the script, they just

  • exist and are waiting to happen.

  • In fixed update that we created earlier

  • we already got the input, we stored that.

  • Now after we've got the input entirety

  • we now need to call these functions that we've created.

  • So we call them just by using their name.

  • And then parsing in the values if they're required.

  • So Move requires 2 floats,

  • we've got our floats for input there

  • and that's all that we need to do.

  • So we need to say H and V

  • semi-colon.

  • Then we'll call Turning which doesn't take any parameters

  • And finally we'll call

  • Animati, which does.

  • Like that.

  • These are in fixed update, so they're being called

  • every physics step.

  • That is the end of that script so what I want you to do

  • now is to go to File - Save

  • and switch back to Unity.

  • If anything is wrong you will see an error

  • at the bottom of the screen in red.

  • When you have no errors in your script,

  • when you press play at the top of the editor

  • you can move your character around with the arrow keys

  • or W, A, S and D.

  • The animation should function

  • but the actual movement of the mouse should be a little bit

  • tricky right now because we haven't moved the

  • camera to the right point, so the camera isn't

  • seeing the entirety of the floor quad yet

  • and that can be a problem, but we're going to solve

  • that in the next phase.

  • So you should be able to move around.

  • You'll note if I move the mouse up away from the floor quad

  • that it doesn't rotate.

  • As soon as I move it back over there the rayCast

  • kicks back in and I can turn around

  • and run around this this.

  • Okay so we're at the end of phase 2.

  • Phase 3 will be setting up the camera

  • and we're going to have a quick look at the script that

  • will make that camera work.

So what we're going to do is setup our player now

Subtitles and vocabulary

Click the word to look it up Click the word to find further inforamtion about it