
appearance
US /əˈpɪrəns/
UK /əˈpɪərəns/
- Noun
- The way a person looks to others
- The way that something looks
A2TOEICMoreas well as
US /æz wɛl æz/
UK /æz wel æz/
- Adverb
- Also; in addition to
- Preposition
- In addition to; and also.
A1Moreasset
US /ˈæsˌɛt/
UK /'æset/
- Noun (Countable/Uncountable)
- Thing that has value to you
A2TOEICMoreassign
US /əˈsaɪn/
UK /ə'saɪn/
- Transitive Verb
- To give someone a particular job to do
- To give someone credit or blame for something
B2TOEICMorebump
US /bʌmp/
UK /bʌmp/
- Verb (Transitive/Intransitive)
- To bounce along over a rough surface
- To knock against with force or violence
- Noun
- Act or sound of one solid object hitting another
- Raised area on any smooth surface
B1Moreby default
US /baɪ dɪˈfɔlt/
UK /bai diˈfɔ:lt/
- Adverb
- Automatically, unless the user specifies otherwise.
- Because of a lack of any other action or choice.
component
US /kəmˈponənt/
UK /kəmˈpəʊnənt/
- Noun (Countable/Uncountable)
- One of the parts that something is made up of
- A constituent part; ingredient.
- Adjective
- Being a part of something
A2Moredefault
US /dɪˈfɔlt/
UK /dɪ'fɔ:lt/
- Noun (Countable/Uncountable)
- Automatic setting when no indicated preference
- Failure to meet an agreement or make a payment
- Verb (Transitive/Intransitive)
- To fail to meet as agreed; failure to pay
- To return to a previously determined state
B2TOEICMoreflat
US /flæt/
UK /flæt/
- Noun (Countable/Uncountable)
- Apartment; set of rooms for living in
- The smooth or level part of something
- Verb (Transitive/Intransitive)
- To share an apartment with someone
- To fail to produce the intended effect; to be unsuccessful or uninteresting.
A2Morefor example
US
UK
- Phrase
- As an illustration or instance.
in addition to
US /ɪn əˈdɪʃən tu/
UK /in əˈdiʃən tu:/
- Preposition
- Besides; as well as
- Phrase
- Besides; as well as.
- Furthermore; moreover.
B1Morein the scene
US
UK
- Phrase
- Present at the location where something is happening or has happened.
- Actively participating in a performance or dramatic situation.
A1Morelook at
US /lʊk æt/
UK /luk æt/
- Phrasal Verb
- To use your eyes to focus on something
- To focus your eyes on something carefully
A1Morelook for
US /lʊk fɔr/
UK /luk fɔ:/
- Phrasal Verb
- To try to find a thing or person that is lost
- To expect or anticipate something.
A1Morelook to
US
UK
- Phrasal Verb
- Be looking to. be planning to (do something)
- To expect someone to do something for you; rely on
A1Morematerial
US /məˈtɪriəl/
UK /məˈtɪəriəl/
- Noun (Countable/Uncountable)
- Cloth; fabric
- Supplies or data needed to do a certain thing
- Adjective
- Relevant; (of evidence) important or significant
- Belonging to the world of physical things
A2Morepanel
US /ˈpænəl/
UK /'pænl/
- Noun (Countable/Uncountable)
- Group who answer questions or give opinions
- Flat surface with controls and switches
- Transitive Verb
- To cover a wall with thin pieces of wood
A2TOEICMoresuch as
US /sʌtʃ æz/
UK /sʌtʃ æz/
- Preposition
- For example; like
A1Moresurface
US /ˈsɚfəs/
UK /'sɜ:fɪs/
- Transitive Verb
- To give (road) a top layer
- Intransitive Verb
- To appear after being hidden, unseen, or unknown
- To come to the top of something; emerge
A2TOEICMoretexture
US /ˈtɛkstʃɚ/
UK /ˈtekstʃə(r)/
- Noun (Countable/Uncountable)
- Quality from different elements, as in music
- Look and feel of a substance or material
- Transitive Verb
- To give a particular look or feel to a surface
B1Moreused to
US /juzd tu/
UK /ˈju:st tə/
- Adjective
- Did regularly before, but don't do now
- Auxiliary Verb
- Have done before, but do not do now
A1More
Vocabulary
- for example: As an illustration or instance.
- such as: For example; like
- used to: Did regularly before, but don't do now
- by default: Automatically, unless the user specifies otherwise.
- as well as: Also; in addition to
- look for: To try to find a thing or person that is lost
- look at: To use your eyes to focus on something
- in the scene: Present at the location where something is happening or has happened.
- in addition to: Besides; as well as
- look to: Be looking to. be planning to (do something)
- material: Cloth; fabric
- simply: In an easy or clear manner
- create: To make, cause, or bring into existence
- flat: Apartment; set of rooms for living in
- project: To predict what will happen in the future
- surface: To give (road) a top layer
- texture: Quality from different elements, as in music
- appearance: The way a person looks to others
- normal: Standard or regular way of doing something
- component: One of the parts that something is made up of
- panel: Group who answer questions or give opinions
- bump: To bounce along over a rough surface
- asset: Thing that has value to you
- default: Automatic setting when no indicated preference
- assign: To give someone a particular job to do
Get the full experience in the app
Learn anywhere with detailed sentence and usage analysis
01:03
She took a brave step forward, leaving behind her comfort zone to chase her dreams.
Vocabulary
- brave
adj. Having courage
- comfort zone
phr. A familiar situation where one feels safe
Explanation
a brave step is a noun phrase, where brave is an adjective modifying the noun step, meaning "a courageous step".
forward is an adverb modifying step, meaning "ahead".
The whole phrase serves as the object, answering the "what" of took (verb) — she took a brave step forward.
Get the full experience in the app
Look up words anytime with pronunciation, part of speech, and usage
brave
US/brev/
UK/breɪv/
adj.Brave
v.t.To bravely face
A2 Elementary
Get the full experience in the app
Practice speaking anytime and get instant pronunciation feedback
Try this speaking exercise.
Try practicing with this sentence.
80
0
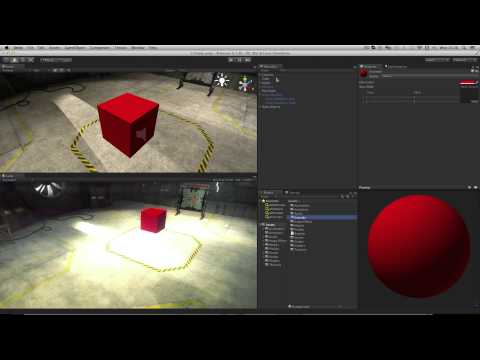
朱瑛 posted on 2014/05/02Ever wondered how to make your 3D models pop in Unity? This tutorial dives deep into setting up materials and shaders, showing you exactly how to use normal maps for that extra visual flair! You'll pick up some awesome game dev vocabulary along the way, making your projects look even more professional.
Learn this video on the APP!
The VoiceTube App has more in-depth practice for videos!