Placeholder Image

Subtitles section Play video

  • Hey everyone.

  • My name is Jasmine Anita and I'm a digital artist and illustrator.

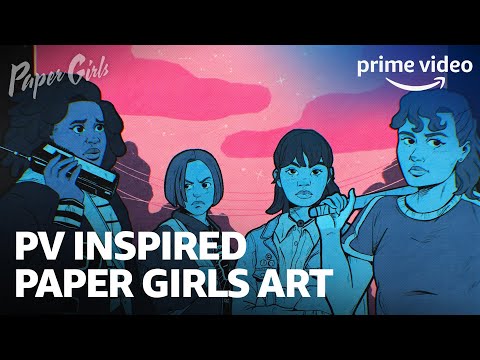
  • Today I'm going to be making a piece inspired by the four main characters in amazon Prime video's new original series.

  • Paper Girls Welcome to PV inspired.

  • This is a place where crafters creators and artists make one of a kind pieces inspired by amazon Prime video movies, series and characters.

  • He's really going to fight these guys.

  • That's our plan.

  • No, if tiffs walkie is broken, we're murdering them.

  • Damn straight.

  • All right, let's get into it.

  • Since paper girls is set in the 80's.

  • I really want to mimic the style of vintage posters.

  • That means there's going to be a lot of texture and dimension to this piece.

  • So the first thing I'm gonna do is use a rectangle to frame the campus.

  • This is just going to give me an idea of where I'm going to start the illustration Next I'm going to start mapping out the characters.

  • I'm not focusing on finalizing any details at this stage.

  • Instead I'm going to use loose lines and shapes to get an idea of the characters form.

  • Once I've finished rearranging the characters, I'm gonna start refining the sketch during this stage is when I start bringing the characters to life.

  • I'm going to lower the opacity of the first layer and use it as a guide as I start refining the sketch.

  • I'm defining the facial expressions, hairstyles and clothing and when I'm satisfied with how they're looking.

  • I'm gonna flip the canvas and use the liquefied tool to make adjustments where I see fit I'm going for a celestial neighborhood environment inspired by the original promo pictures.

  • So I'm sketching out a background within the rectangle I created before.

  • Yeah.

  • The next step is the fun part the thinking process.

  • Once I lower the opacity on our refined sketch, I'm going to use a textured brush and start going over the characters in this stage.

  • I'm paying close attention to those details.

  • I mapped out earlier and carefully tracing over them.

  • I'm adding little details to the clothing and props and also shadows and depth on the skin and hair.

  • I'm going to go back later and add more in the end but this is a good baseline.

  • Before I start coloring in gray scale, I'm going to make some tweaks to the background and then use the selection tool to section off all four of the characters.

  • Once they're selected, I'm going to use the color fuel tool and fill them with a neutral gray base.

  • Next I'm coloring outside of our background and the characters a dark gray with this part, you can really see how it's used to frame the piece.

  • Once the entire images in grayscale, I'm going to use similar gray tones to color the image here.

  • I'm focusing on values where the darkest and lightest shades should be.

  • This is going to be really important when I add color to the image.

  • Finally it's time to add some color.

  • I'm starting with the landscape first and tracing over my sketch layer in vibrant shades of pink, the sky and clouds and a deep purple for the trees.

  • Once the background is finished, I'm going to merge my grayscale layer and use the gradient map tool to add color to the layer, you can see how are gray values on the characters were replaced with these pretty shades of blue.

  • Next I'm going to color in a few spots I missed before when I was great scaling the image.

  • I'm also going to duplicate the layer with the characters on it, fill it with black and use it as a shadow to add dimension.

  • Now we get to add the final details.

  • I'm starting with an overlay layer on top of the characters using a half tone brush.

  • This is going to add texture and dimension to the characters.

  • Next I'm adding a white border and stars to the landscape.

  • The paper girls logo is from the original series and I'm duplicating the layer and filling it with black to create a shadow before making minor adjustments to the background.

  • Like I mentioned before, I'm going back to the thinking layer to add hatching and fine lines for texture.

  • I'm writing in text to highlight the collaboration with amazon Prime Video and myself and finally locking in the image by copying the canvas and pasting it to give the piece more depth.

  • I'm using the chromatic aberration tool.

  • This is just going to slightly distort the image and give it the vintage lens feel I was going for.

  • I'm adding shapes on an overlay layer and using the liquefy tool to distort those as well.

  • The last thing I'm going to do for this piece is use a textured brush on an overlay layer to paint the entirety of a picture.

  • This final touch really brings the rest of the image together.

  • What's going on?

  • All right, come on.

  • My house isn't far move move.

  • Let's get out of here and that's it.

  • Thank you so much for tuning in everyone.

  • I hope you enjoyed this video.

  • And if so, don't forget to like comment and subscribe to amazon Prime video.

  • Alright, have a good one.

Hey everyone.

Subtitles and vocabulary

Click the word to look it up Click the word to find further inforamtion about it