Placeholder Image

Subtitles section Play video

  • Unmesh Dinda 0:02 Hi there, this is Unmesh from PiXimperfect.

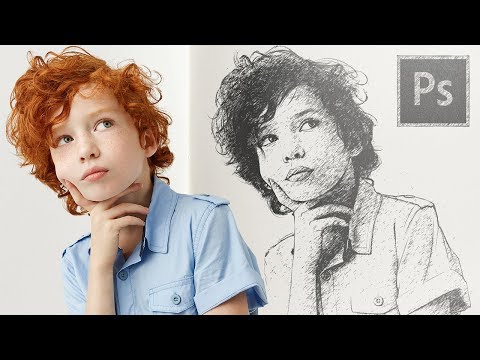
  • And today I'm going to share with you a quick and easy way to convert your photos to a simple

  • sketch in Photoshop.

  • You're going to be using the good old ingredients - Blend Modes, Blend If and filters.

  • But, you know what?

  • The only thing that makes a recipe great is the right combination.

  • And what is it?

  • Let's find out.

  • So, without any further ado, let's get started.

  • This video is made possible by the support of our awesome Patreons.

  • If you wish to receive exclusive PiXimperfect books like access to more than 350 PSDs and

  • assets from all of our tutorials and Photoshop help from me and the entire PiXimperfect Patreon

  • community, do consider becoming a member of PiXimperfect Patreon family by clicking the

  • link in the description and get three free actions just for checking it out.

  • Back in the magical world of Photoshop.

  • And if you wanna go ahead and download any of the photos shown in the tutorial, check

  • the links in the description.

  • So, here we have our surface image open, the surface on which we're going to place the

  • pencil sketch.

  • So, let's go to our Finder or Explorer and drag and drop in the subject over the canvas,

  • right.

  • Over the canvas, not here, over the canvas.

  • Now it's time for us to adjust it.

  • Let's rotate it a little bit.

  • Let's make it a little smaller and place it over the notebook, just like this.

  • Now when it's time for us to mask out the areas which we do not want in the pencil sketch.

  • With the Subject layer selected, click on the Mask button right there.

  • Now, take the brush, make sure the foreground color is black, because black hides, make

  • the brush a little bigger, with a soft brush just erase the areas which you do not want.

  • I want to decrease the flow to about 20% because I want to fade the bottom of the subject just

  • like that.

  • You might as well want to go even lower to maybe 10% when you're working on the subject.

  • Now, when you're not working on the subject, you can always go higher, maybe 40% and just

  • erase the areas which you do not need.

  • Now let us adjust the subject again.

  • With the Subject layer selected, press Ctrl or Command + T, and now, let's make it a little

  • smaller, place it right over here, that seems to be nice.

  • And this looks all right.

  • Now, once you're ready with this, hit Enter or Return.

  • Because we want to have the fading of the subject, have a look here, the fading of the

  • subject needs to be a part of the filter, not just a normal fading.

  • And for that we need to add a white background.

  • So, with the Background selected, click on the Adjustment layer icon and choose a Solid

  • Color and choose the color White.

  • Now, don't worry about it.

  • It will be hidden because we're going to change the Blend Mode to Multiply.

  • Now, as we can see, there's a little bit area left over here.

  • So select the Subject Mask, take the brush, black as the foreground color and just paint

  • black on it.

  • It's fine.

  • Now, we need to select both, the Subject and the color Fill layer.

  • So, select the Subject layer, hold the Ctrl or Command, select the Color Fill layer.

  • Right click on it and choose Convert to Smart Object.

  • Now it's all one.

  • Now, if you want to access the Mask or any of the Properties, you can always double click

  • on the thumbnail, a new document will show up with the Mask and everything, the background

  • layer as well.

  • And if you want to change anything, change it right here and go to File - Save and it

  • will update the original document.

  • I don't want to do anything.

  • So I'm just going to simply close this down.

  • Now, let's change the Blend Mode from Normal to Multiply because Multiply is the Blend

  • Mode which darkens stuff.

  • And the Blend Mode - Multiply hides everything which is 100% white.

  • Have a look at it, it's already giving you a nice effect.

  • Now it's time for us to apply the Pencil Sketch Filter.

  • So let's go to Filter - Filter Gallery.

  • Now inside of that, just make sure this just one filter right there.

  • If there are more, you're going to select them and click on the Delete button right

  • there.

  • So we're going to go under Sketch, and under Sketch, you're going to find Graphic Pen,

  • and it automatically gives your image very nice sketch effect.

  • Let's zoom in.

  • And there are values that you can control.

  • You can control the Stroke Length, whatever you want, but, I'm going to keep it at 9.

  • 9 works fine for me, and Light/Dark Balance, I'm going to leave it at 57.

  • You can play with it.

  • See what works for your image.

  • Stroke Direction can be anything you want.

  • You can keep it Horizontal, you can keep it Left Diagonal.

  • Let's leave it at Right Diagonal for this example, and just hit OK.

  • It's wonderful, isn't it?

  • But if you zoom in, there's one problem.

  • When we sketch with a pen or a pencil on a piece of paper, it's never 100% black.

  • So, to add a little bit of realism, we need to include the texture of the paper into the

  • subject, into the sketch.

  • And how do we do that?

  • Simple.

  • Blend If.

  • So, with the Subject layer selected, double click on the right hand side of the layer,

  • this opens up the Layer Style dialog box.

  • Now, take the slider of the underlying layer from right to left.

  • This takes away the bright areas of the layers which are underneath it from the current layer.

  • But right now when we take it away, it's very, very harsh, right?

  • So we need to soften it up a little bit.

  • So, hold the Alt or Option, click on the slider to break it apart, and just take it apart.

  • As easy as that.

  • And have a look at it, the texture of the paper is showing up in here.

  • Pretty nice, isn't it?

  • You can take it even further if you want to.

  • But I'm going to leave it at about 228, that's fine for this example and hit OK once you're

  • satisfied.

  • Also, it's too dark on the left hand side.

  • What to do?

  • Let's decrease the Opacity.

  • So, let's set it to about 75%.

  • See how it is.

  • Maybe 77%.

  • Let's zoom out and have a look.

  • Wow, that is much more, way more realistic.

  • But there's, again, one more problem.

  • If you zoom in, have a look at the sketch, it's very sharp.

  • We never do such sharp sketches.

  • It's pixel sharp.

  • So, we need to add a little bit of blur to it.

  • And how do we add blur?

  • You already know that.

  • Go to Filter - Blur and then Gaussian Blur.

  • Let's add 0.4 or point 0.5.

  • 0.4 is kind of too much blur.

  • Let's zoom in.

  • It's kind of too much.

  • Let's go for 0.3.

  • What do you think?

  • 0.3 is something acceptable.

  • Hit OK and zoom out.

  • Wow, that is way better.

  • Now, here comes an optional step.

  • You can leave it at that if you want to.

  • However, if you want to take it a step further, if you want to add some realism to it, we

  • need to do something real.

  • So, let's create a new layer and in this layer, we're going to take a realistic pencil brush

  • and just add some outlines to the image.

  • On the new layer.

  • You can just name it Pencil Outline, zoom in to the image.

  • With the brush selected, make sure the foreground color is black, and now change the brush to,

  • I'm going to choose Dry Media brushes.

  • Select the first one - KYLE Ultimate Pencil Hard.

  • If you're CC member, you can always download these brushes for free from Adobe's website.

  • Adobe already comes preloaded with these brushes.

  • Now, what we have to do is to just zoom in and draw the outlines.

  • But, if I draw the outlines in here, it's going to be darker than the sketch.

  • We don't want that to happen.

  • So, here is what we do.

  • Let's go back and then, before you sketch anything, hold the Alt or Option, click on

  • the line between these two layers - Pencil Outline and the Subject.

  • Now this is clipped.

  • Now, whenever you paint something on it, it's never going to be darker than the subject

  • sketch.

  • So, let's zoom in and just simply add some outlines to it.

  • Nothing difficult here.

  • You can increase the Flow if you want to.

  • I'm going to keep the Flow at somewhere about, let's try 100%.

  • Let's see what kind of effect it yeilds.

  • 100 is nice.

  • Let's make the brush a little smaller.

  • If you're wondering how did I rotate it, just hold the 'R' key, rotate it.

  • Then when you release the 'R' key, it gets back to the Brush.

  • If it doesn't get back to the Brush, you can always press the 'B' key for the brush tool.

  • If you're having difficulties drawing the lines, you can also do this, you can temporarily

  • turn off the Gaussian Blur and the Filter Gallery.

  • And then you can just follow along and now you can get back to the pencil outline, and

  • then just draw the outline accordingly.

  • Now, let's turn on the Gaussian Blur and the Filter Gallery and see how that Looks.

  • Wow, that looks wonderful, doesn't it?

  • Now, let's do the other areas which are left out at the bottom.

  • I'm going to turn them off again to see the lines and get back to the pencil outline layer.

  • I think you don't have to do that so far.

  • So let's take the eraser and erase this.

  • It's kind of too much.

  • We don't need it.

  • Up to this point, I guess, up to this point, it's fine.

  • And it's okay.

  • Now let's take the Brush back again and just draw that as if it was drawn with a real pencil.

  • This is fantastic.

  • Now, let's just complete these outlines.

  • Now, I think it looks pretty okay.

  • We can totally stop at that.

  • But, you can take all the time in the world to sketch all the intricacies of this picture.

  • But if you zoom in, have a look at this, some of the lines outside are going outside the

  • page.

  • No problem at all.

  • We are going to the select the Subject layer, click on the Mask button and take the Brush,

  • take a soft brush in the General Brushes, just take a soft round brush and erase those

  • off.

  • With black as the foreground color, you can just erase them off.

  • Leave some, you don't have to erase them all.

  • Just the ones that are out of the page.

  • So, erase them and we are good to go.

  • Have a look at this.

  • Isn't this looking wonderful?

  • So there you go, a quick and easy way to convert your photos to a simple pencil sketch in Photoshop.

  • Just a quick little recap.

  • We used two concepts here.

  • Number 1, the Blend Mode - Multiply.

  • The Multiply Blend Mode hides everything which is 100% white and only darkens.

  • With the help of the Multiply Blend Mode, we were able to bring the texture of the paper

  • in the white areas.

  • Now, to bring the texture in the dark areas, we used Blend If.

  • The second thing that we used in here, the second major thing, was the Graphic Pen filter.

  • So, simply go to Filter Gallery and Graphic Pens.

  • Do check out the other filters as well.

  • There are some really cool filters.

  • I hope this video helped you and if it did, make sure to give us a like and also don't

  • forget to subscribe and not just subscribe, ring the bell so that you don't miss any other

  • future tip, trick or tutorial.

  • Thank you so much for watching.

  • I'll see you guys in my next until then stay tuned and make sure that you keep creating.

  • Transcribed by https://otter.ai

Unmesh Dinda 0:02 Hi there, this is Unmesh from PiXimperfect.

Subtitles and vocabulary

Click the word to look it up Click the word to find further inforamtion about it