Subtitles & vocabulary
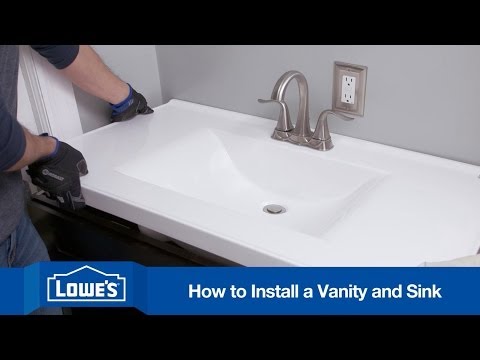
How To Install a Bathroom Vanity
00
nckuba posted on 2014/04/05Save
Video vocabulary

mean
US /min/
・
UK /mi:n/
- Noun (Countable/Uncountable)
- Average of a set of numbers
- A method, course of action, or instrument by which something can be accomplished.
- Verb (Transitive/Intransitive)
- To express a particular idea or thought
- To intend to do something in particular
A1TOEIC
More turn
US /tɚn/
・
UK /tɜ:n/
- Intransitive Verb
- To become (a particular age)
- To become a different quality, color, etc.
- Verb (Transitive/Intransitive)
- To change the direction of something, e.g. a car
- To move in an opposite direction or position
A1
More place
US /ples/
・
UK /pleɪs/
- Transitive Verb
- To put someone in a particular type of situation
- To put something in a certain location or position
- Noun (Countable/Uncountable)
- Particular location, area or region
- A position in a sequence or structure.
A1TOEIC
More fit
US /fɪt/
・
UK /fɪt/
- Adjective
- Good looking; physically attractive
- Having good physical health and strength
- Verb (Transitive/Intransitive)
- To install a machine, equipment etc.
- To adjust or change to the right size or shape
A2
More Use Energy
Unlock Vocabulary
Unlock pronunciation, explanations, and filters

