Placeholder Image

Subtitles section Play video

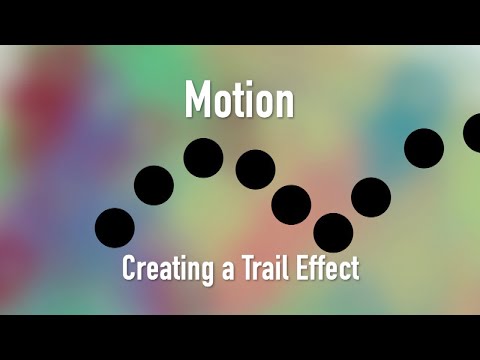
  • In this video I'm going to show you how to use Motion to create an effect like

  • this one.

  • The video being used as an example

  • has a tennis ball bouncing across the screen.

  • When you record a video for this effect,

  • it should be shot with a tripod

  • and a higher frame rate if possible.

  • This video was shot at 720p

  • at sixty frames per second (60fps).

  • The first step is to create a new Motion project with the same settings as the

  • video clip.

  • If you can,

  • select the correct duration of the video here.

  • Motion 5 can be purchased from the Mac App Store for $49.

  • Press the fit button at the top right

  • and choose fit in window

  • to make sure the video will be displayed correctly.

  • Also press the show timeline button at the bottom right of the interface.

  • Then press the show project pane button

  • to display the layers for the project.

  • Now that the interface is set up,

  • drag the video clip from the file browser

  • onto the empty group player in the layers tab.

  • Using the timeline, move the playhead around to preview your clip.

  • Before you start the work, it's a good idea to know how many frames you want

  • in between each freeze.

  • Looking back at the skater,

  • there is about five to eight frames in between each freeze.

  • For this bouncing ball,

  • I found that five frames works well.

  • Make sure the main video layer is selected.

  • Move the playhead to the first frame you want the object of freeze on.

  • With the playhead paused on the frame we're going to freeze press Command-D

  • on your keyboard.

  • This duplicates the video layer. Then press "I" on the keyboard to set an

  • in point on the duplicated layer.

  • next press "O" on the keyboard to set in out point.

  • What we have now is a single frame of video on a new layer. To keep this frame

  • on screen for the rest of the video,

  • go to the Inspector. Open the properties tab

  • and head down to the timing section.

  • To keep this frame on screen as a still image, change the end condition from "none"

  • to "hold".

  • In the timeline

  • dragged the end of the clip to the end of the video.

  • You may need to zoom in to the timeline

  • to select the end of the freeze-frame.

  • Playing back the project at this point will show the video

  • up until that frame with a video freezes

  • our goal is to leave just the ball frozen.

  • In your video

  • this may be a person

  • or other object that creates the trail.

  • The next step

  • is to create the mask around the object.

  • Make sure the correct layer is selected and press and hold the add mask button.

  • Choose a mask based on the object you are working with.

  • In my case I'm working with a tennis ball

  • so the circle mask would be the best choice. Chances are you're working with a

  • more complicated object

  • that requires a Bezier

  • or B-Spline Mask.

  • If I was trying to add a mask to the bench in the background.

  • I would select the Bezier mask and then click on an edge of the bench.

  • You can keep clicking around the object to create the mask.

  • If you click and hold and then drag

  • you will create a rounded curve.

  • Get used to this technique of working with Bezier curves

  • as it comes in handy when working in Motion

  • and other applications like Photoshop

  • Illustrator and Maya.

  • I can delete the mask layer I just created and start over with the

  • circle mask

  • I'll select the circle mask and then click and drag around the tennis ball.

  • When you let go the mask is created and you may not notice any change.

  • Just move the arrow keys to move the playhead forward five frames.

  • Notice the tennis ball moves to the next spot

  • but there is one ball left behind.

  • I can now select the original ball layer and press Command-D to duplicate the layer.

  • "I" then "O" to set the in and out points.

  • Go to the properties tab in the inspector to change the end

  • conditioned to hold.

  • In the timeline

  • I'll drag the new still to the end of the video.

  • With that layer still selected, add a circle mask

  • and draw the mask in the Canvas.

  • Remember that masks can be adjusted anytime.

  • Now it's just a matter of repeating the steps for each frame you want something

  • to be left behind.

  • Command-D

  • "I" then "O"

  • End condition set to "hold"

  • Dragged a frame for the end of the video

  • and then add the mask.

  • Repeat these steps a few more times and then review your progress.

  • Don't finish the entire clip

  • before previewing.

  • If I decided that five frames was too frequent,

  • it's easier to save time and change that now

  • compared to later.

  • At any time when previewing the project

  • press Command-R to create a RAM preview.

  • This is a great way to get a preview

  • with less lag

  • and a clearer look.

  • Make sure you save often with the Command-S shortcut

  • as Motion is a complicated application

  • and can unexpectedly quit at any time.

  • When the effect is finished, use the Share menu to export the video.

  • If you're going to add this to a Final Cut Pro project

  • choose "export movie"

  • You can choose an Apple ProRes format

  • that will work well with Final Cut or other format.

  • If you have any questions

  • send an email to FinalCutProHelp@me.com

  • or check out An Awesome Guide to Motion 5 on Amazon or iTunes

  • iTunes for more information, Thanks.

In this video I'm going to show you how to use Motion to create an effect like

Subtitles and vocabulary

Click the word to look it up Click the word to find further inforamtion about it