Placeholder Image

Subtitles section Play video

  • Hi. This is Marty from Blue Lightning TV. I'm going to show you how to transform a photo

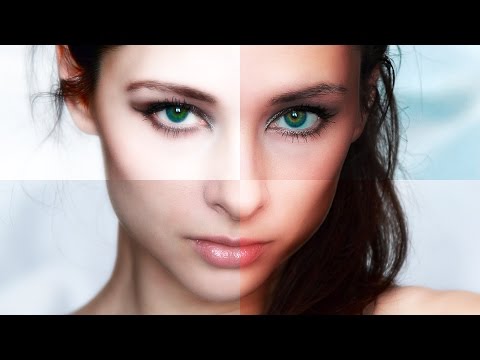
  • into glamorous portraits by adding a variety of sexy, skin glows you often see in fashion

  • magazines, posters and record album covers. Open a photo you'd like to use. I downloaded

  • this one from Shutterstock.com. The first thing we should do is to convert your image

  • into a Smart Object, so any effects we give it will be non-destructive. Click the icon

  • at the top, right corner of the Layers panel and choose "Convert to Smart Object".

  • I'll show you the fastest and simplest way to give it a glamorous, skin glow. Make a

  • copy of it by pressing Ctrl + J on Windows or Cmd + J on a Mac.

  • Go to Filter and Filter Gallery. Open the Distort folder and click Difuse Glow.

  • We won't add any graininess because we want to keep our image as smooth as possible. The Glow amount controls how bright the glow

  • and the Clear amount determines how much of the image is covered by the glow.

  • For this particular image, I'll set the glow at 1 and the Clear at 6. Keep in mind, depending on

  • the size, resolution and characteristics of your photo, you should experiment with these

  • amounts until you get just the right combination that looks good to you. Then, click OK. Click

  • Click the Adjustment layer icon and choose "Vibrance". Click the "Clip-to-Layer" icon which clips

  • or restricts the adjustment layer to effect only the one layer beneath it in the Layers

  • panel. Slide the Vibance all the way to the right. As you can see when I toggle back and forth, we now added a soft, skin glow to our

  • image and we did it with just one adjustment layer and one filter. Now, I'll show you some

  • other ways to achieve beautiful, glamorous effects, but this time, with a bit more complexity.

  • First, let's group the last effect into its own folder. To do this, Shift-click on the

  • thumbnail of the middle layer to highlight it and press Ctrl or Cmd + G. Click off the

  • eyeball next to the folder to hide it. Click Layer 0 to make it active and make a copy of it.

  • Change the Blend Mode to Overlay. Go to Filter, Blur and Gaussian Blur. Reduce

  • the view until you can see most of the face. Adjust the Radius amount, so you can barely

  • make out the eyes, nose and mouth. Then, click OK. Hide the layer and make the bottom layer

  • active. We want to make a selection just around the skin. To do this, go to Select and Color

  • Range. Make sure Selection is ticked. If you're working on CS5 or earlier, choose Sampled

  • Colors and adjust the Fuzziness until you see that most of the skin is selected with

  • as little of the rest of the image showing. Then, click OK. If you're working on CS6 or

  • later, choose Skin Tones. Photoshop automatically finds the skin and adjusts the color range

  • to get the best selection. Then, click OK. Press "Q" to make the selection into a quickmask.

  • Open your Brush Tool and choose a medium-sized brush and a Hardness of 0%. Make sure the

  • Opacity and Flow are 100% each. Now, paint over areas that aren't part of the skin.

  • To remove areas of the quickmask, make the foreground color white by pressing "x"

  • on your keyboard or by clicking this icon. Now, brush over areas of the skin that the

  • quickmask covered, as well as the lips. To enlarge or reduce the size of the brush, press

  • the the right or left bracket keys. Now, brush over those areas.

  • To paint back in areas, press "x" again to make the foreground color black. Make sure you have the eyes and eyebrows filled in.

  • When you're done, press "Q" again to revert the quickmask back into a selection. Make the middle layer visible and active.

  • Click the Layer Mask icon to make a layer mask of the selection next to the active layer.

  • As I turn the layer mask off and on, you can see the difference. Next, we'll make the eye

  • color more attention-getting. First, make a composite snapshot of your image by pressing

  • Ctrl + Shift + Alt + E on Windows or Cmd + Shift + Option + E on a Mac. Then, make a

  • copy of it. Make sure black is your foreground color and click on the quickmask icon, so

  • we can brush in a quickmask. Now carefully brush over just the irises.

  • Press "Q" to make it into selections and then click the Layer mask icon to make a layer mask of the selections.

  • Invert the layer mask by pressing Ctrl or Cmd + I. Click the photo to make it active

  • and click the Adjustment layer icon. Choose Vibrance

  • and click the clip-to-layer icon to restrict the adjustment layer to just the irises. Slide the Vibrance and Saturation all the way to the right.

  • The last effect can be achieved simply by adding a filter that we used earlier. First, make another composite snapshot

  • and go to Filter, and Filter Gallery. Use Diffuse Glow again with same settings you used earlier.

  • To intensify the effect, press Ctrl or Cmd + F to repeat the last filter.

  • Have fun transforming regular photos into glamorous, sexy portraits.

  • This is Marty from Blue Lightning TV. Thanks for watching!

Hi. This is Marty from Blue Lightning TV. I'm going to show you how to transform a photo

Subtitles and vocabulary

Click the word to look it up Click the word to find further inforamtion about it